

Why Soft Close Seats Are Worth Installing and What You Need to Know First
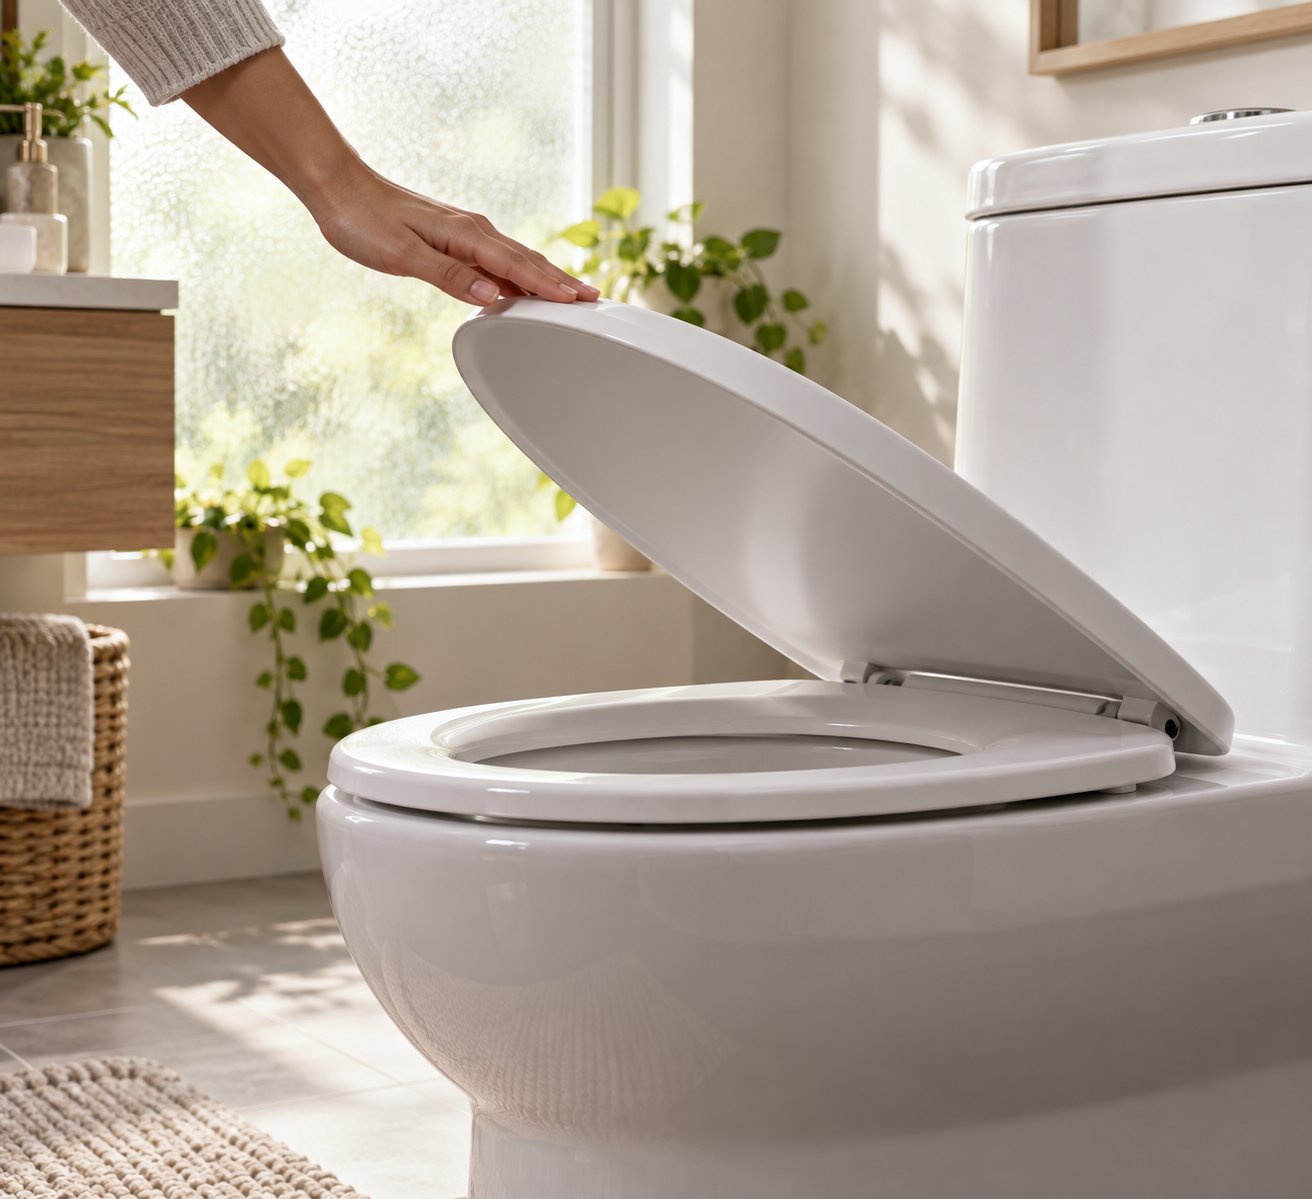
Imagine it is 2 a.m. and the entire house is asleep. Then someone uses the bathroom, and the toilet lid crashes down like a cymbal. That one loud slam is exactly why millions of homeowners choose to install a soft close toilet seat. The upgrade is quiet, gentle on porcelain, and gives any bathroom an instant modern feel. Quality soft close hinges can handle roughly 40,000 to 55,000 open-and-close cycles before they need attention, so you are investing in years of silent operation and reduced wear on your bowl.
This guide walks you through the entire process, from measuring your bowl and wrestling with rusted bolts to fine-tuning the hinge tension after the new seat is on. Whether you are tackling a Bemis soft close toilet seat installation, looking to install a Kohler soft close toilet seat, or working with a TOTO or Roca model, the core steps are the same. Brand-specific differences will be called out wherever they matter.
What Makes a Soft Close Hinge Different
A standard toilet seat hinge is basically a simple pivot. Lift the lid, let go, and gravity slams it down. A soft close hinge works differently because it contains an internal damping mechanism, typically a small rotary damper filled with silicone-based damping fluid. When the lid begins to fall, the hinge rotates and activates this damper. The fluid inside creates controlled resistance that absorbs the kinetic energy of the falling lid, slowing the descent to a gentle, near-silent close.
This is why correct hinge alignment during installation is so important. If the hinge body is crooked or the bolts are unevenly tightened, the damper cannot rotate smoothly. You end up with a seat that slams on one side, creaks, or wobbles, defeating the entire purpose of the upgrade.
What This Guide Covers That Others Miss
Most online instructions skip straight to "drop the bolts in and tighten." Real-world installation rarely goes that smoothly, especially when rusted fixings, mismatched seat shapes, or worn-out hardware enter the picture. This guide fills those gaps with practical, step-by-step detail:
- Step 1 - Identify your toilet shape and measure for the right seat
- Step 2 - Gather your tools and verify the mounting hardware
- Step 3 - Remove the old seat, including stubborn corroded fixings
- Step 4 - Clean the mounting surface and inspect the porcelain
- Step 5 - Install the new soft close seat on your bowl
- Step 6 - Adjust the soft close mechanism and test for smooth operation
- Step 7 - Avoid common mistakes and fix problems fast
- Step 8 - Keep your soft close seat working perfectly for years
Feel free to jump ahead to whichever step you need. But if you are starting from scratch, the smartest first move is confirming you have the right seat for your bowl, and that begins with a quick measurement.
Step 1 - Identify Your Toilet Shape and Measure for the Right Seat
Buying the wrong seat shape is easily the most common soft close toilet seat installation mistake, and it is entirely avoidable with a tape measure and sixty seconds of your time. A round seat perched on an elongated bowl leaves an awkward gap at the front. An elongated seat on a round bowl overhangs the rim by roughly two inches, stresses the hinges, and looks terrible. Either mismatch means wasted money, return shipping, and a delayed project.
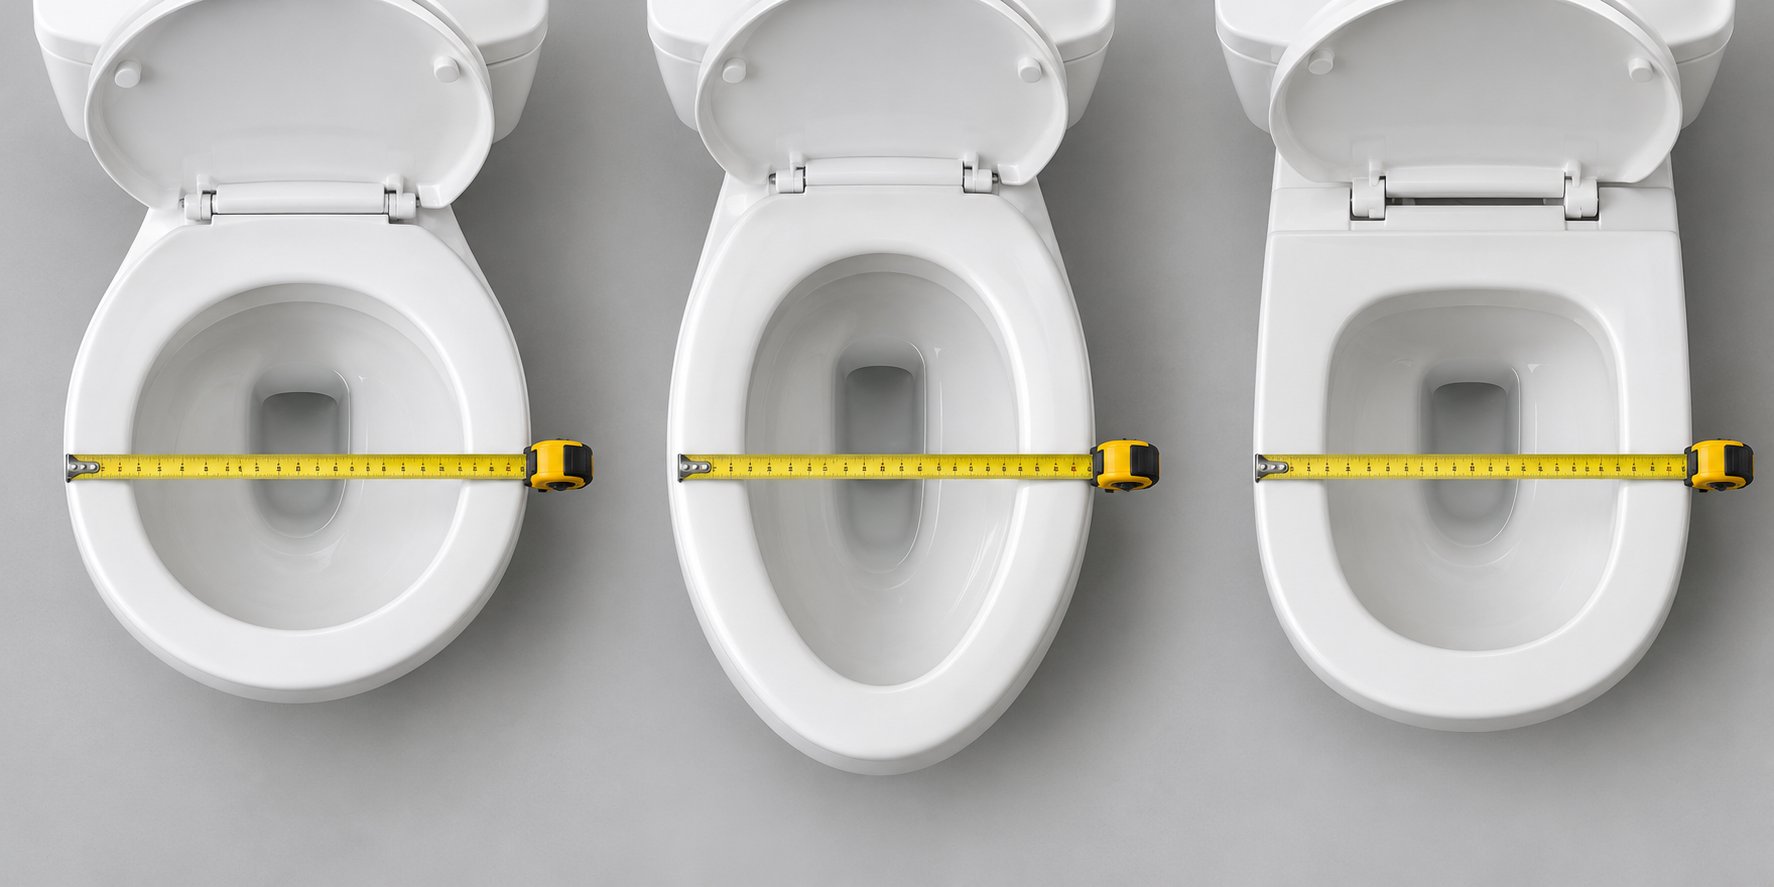
Every toilet bowl falls into one of three general shapes. Identifying yours before you shop ensures the Kohler soft close toilet seat installation, Bemis upgrade, or any other brand you choose goes smoothly from the start.
Round vs Elongated vs D-Shape - How to Tell
Stand directly over your toilet and look down at the rim. You will notice one of these profiles:
- Round - The bowl looks almost circular, with a compact front. These are common in older homes, smaller bathrooms, and powder rooms. The distance from the mounting bolt holes to the front edge of the rim is approximately 16.5 inches.
- Elongated - The bowl stretches into a clear oval shape toward the front, offering more seating depth. This is the default in most newer North American homes. That same bolt-hole-to-front-rim measurement lands around 18.5 inches.
- D-shape - Picture a capital letter D lying on its back: the rear edge is relatively flat or gently curved, while the front rounds outward. D-shape bowls are widespread in European and Australian bathrooms, and you will also see them on many modern wall-hung toilets. Measurements vary more here, so always check the manufacturer's spec sheet.
If your measurement falls somewhere in between, around 17 to 17.5 inches, you may have a "compact elongated" bowl. These typically accept an elongated seat, but confirming with the toilet manufacturer's documentation is the safest move.
Measuring Bolt-Hole Spacing and Bowl Length
Grab a tape measure and follow these quick steps:
- Lift or remove your current seat so you can see the two mounting bolt holes at the back of the bowl.
- Measure the distance between the centers of those two holes. The standard spacing across most brands is roughly 5.5 inches (approximately 140 mm). Some older European fixtures sit closer to 155 mm, so record your exact number.
- Place your tape at the midpoint between the two bolt holes.
- Extend it in a straight line to the very front outer edge of the bowl rim.
- Compare your reading to the shape ranges below.
| Bowl Shape | Typical Bowl Length (bolt holes to front rim) | Standard Bolt-Hole Spacing | Commonly Found On |
|---|---|---|---|
| Round | ~16.5 in (42 cm) | 5.5 in (140 mm) | American Standard, older Kohler models, compact Bemis toilets |
| Elongated | ~18.5 in (47 cm) | 5.5 in (140 mm) | Kohler, TOTO, Bemis, Danze (elongated variant) |
| D-Shape | Varies (check manufacturer specs) | 5.5 in (140 mm) or 155 mm on some EU models | Roca, Villeroy & Boch, Caroma, many wall-hung European designs |
Notice that brands like Danze offer both round and elongated variants of the same toilet. Picking the correct version avoids alignment headaches during installation. If your bolt-hole spacing or bowl length does not match any standard range, snap a photo of the rim from above along with your measurements. Most seat manufacturers have customer support teams that can confirm compatibility before you order.
With your shape identified and measurements written down, the next priority is making sure you have every tool and piece of hardware ready before you start unboxing the new seat.
Step 2 - Gather Your Tools and Verify the Mounting Hardware
Ripping open the new seat box and diving straight into installation is tempting, but a missing screwdriver or an incomplete hardware kit can stall the whole project mid-bolt. Spending three minutes confirming everything is on hand saves a frustrating trip to the hardware store with a half-removed toilet seat waiting at home. Whether you are following TOTO soft close toilet seat installation instructions, a Bemis manual, or a generic brand guide, the tool and hardware requirements overlap almost entirely.
Essential Tools Checklist
You likely own most of these already. Lay them out on a towel near the toilet before you start so every item is within arm's reach:
- Adjustable wrench or pliers - Grips wing nuts and hex bolt heads underneath the bowl rim. An adjustable wrench gives you more torque control than bare fingers, which matters when loosening corroded old fixings.
- Flat-head screwdriver - Pries open decorative hinge caps that cover the mounting bolt heads on many seats.
- Phillips screwdriver - Drives the cross-head bolts used in the majority of soft close toilet seat installation kits, including most TOTO and Bemis models.
- Penetrating oil or lubricant (e.g., WD-40 or PB Blaster) - Essential if the old bolts are rusted or seized. A generous application now can save twenty minutes of wrestling later.
- Tape measure - You already used this in Step 1, but keep it close for a final fit check once the new seat is in position.
- Clean cloth or rag - Wipes down the mounting area after the old seat comes off and before the new hardware goes on.
- Bathroom-safe cleaning spray - Removes grime and mineral buildup around the bolt holes so rubber gaskets seal properly against the porcelain.
One optional but helpful addition: a locking wrench (sometimes called a mole grip or vise grip). If the old bolt spins freely while the nut below refuses to budge, clamping a locking wrench onto the bolt head gives you the two-point resistance needed to break it free.
Understanding the Hardware in Your Mounting Kit
Every new soft close seat arrives with a mounting kit, usually sealed in a small plastic bag tucked inside the box. Before you toss that packaging, open the bag and compare its contents against the manufacturer's parts list printed in the instruction sheet. Here is what you should find and what each piece does:
- Hinge body (x2) - The hinge is the heart of the soft close mechanism. It houses the internal damper that controls the lid's descent speed. Some TOTO soft close toilet seat installation kits use a separate mounting plate that screws down first, after which the hinge body clicks into place.
- Mounting bolts (x2) - These pass through the hinge body and down through the bowl's bolt holes. They can be plastic, brass, or stainless steel depending on the brand and price point.
- Washers (x2 or x4) - Sit between the bolt and the porcelain, or between the porcelain and the nut, to distribute pressure evenly and prevent cracking.
- Base plate or bracket (some kits) - A flat plate that anchors to the bowl first, giving the hinge body a stable platform to lock onto. Common in top-mount systems from Kohler and TOTO.
- Wing nuts or tightening knobs (x2) - Thread onto the bolt from below and cinch the assembly tight against the bowl. Knobs with integrated rubber grips are easier to hand-tighten without tools.
- Rubber bumper pads - Small adhesive pads that stick to the underside of the seat ring, cushioning contact with the porcelain rim and preventing side-to-side sliding.
If any component is missing, cracked, or clearly the wrong size, do not improvise with mismatched parts from a junk drawer. A washer that is too small or a bolt that is too short compromises the entire mount, leading to wobble, noise, or porcelain damage over time.
Material quality matters more than most people realize. Basic all-plastic hardware ships with many budget seats, and while it works initially, plastic threads can strip under repeated tightening, and plastic bolts degrade in humid bathroom environments. Corrosion-resistant materials like brass or stainless steel hold up significantly longer, maintaining a tight, stable connection year after year. If your included kit feels flimsy, or if you are replacing a seat where the original hardware has already corroded away, sourcing a proper replacement mounting assembly is the smartest move before you begin installation.
For situations where original hardware is missing or substandard, Tianyun's Toilet Seat Fixing Systems offer compatible hinge mounting kits, stainless steel bases, and custom fixing assemblies designed for sanitary ware manufacturers and replacement-hardware sourcing teams. Rather than hunting for individual bolts or washers that may not match, a purpose-built fixing system ensures every component works together, proper alignment, consistent clamping pressure, and long-term corrosion resistance straight out of the box.
Quick rule: never start installation with incomplete or damaged hardware. Verify every component against the parts list, upgrade if the material quality is questionable, and keep the packaging until the seat is installed and tested.
With your tools organized and every piece of hardware accounted for, the real hands-on work begins: getting that old seat off the bowl, even if the bolts have other plans.
Step 3 - Remove the Old Toilet Seat Including Stubborn Corroded Fixings
Here is where plenty of DIY guides lose you. They say "remove the old seat" as if it is one casual step, like unscrewing a light bulb. In reality, removing an old toilet seat can take anywhere from thirty seconds to an entire afternoon, and the difference almost always comes down to one thing: the condition of the mounting bolts. If yours spin freely, you are golden. If they are rusted, corroded, or fused to the nut by years of bathroom moisture, you are in for a bit of a fight. Either way, this section has you covered.
Standard Removal When Bolts Turn Freely
If your existing seat is relatively new or the bathroom stays well-ventilated, there is a good chance the bolts will cooperate. Follow these steps:
- Flip open the hinge covers. Most toilet seats have small plastic caps or covers at the back that snap over the bolt heads. Use a flat-head screwdriver to gently pry them up and forward.
- Locate the mounting bolts. You will see two bolt heads sitting in the hinge area on top of the bowl. Directly below the bowl rim, the corresponding wing nuts or hex nuts hold everything in place.
- Stabilize the bolt from above. Place your screwdriver into the slot or cross-head of the bolt and hold it firmly so it cannot spin.
- Turn the wing nut counter-clockwise from below. Reach under the back of the bowl rim with your free hand or an adjustable wrench. Turn the nut to the left until it threads off completely. Repeat for the second bolt.
- Lift the seat assembly straight up and off the bowl. Both the lid and seat ring should come away as a single unit once both bolts are removed.
The whole process takes under two minutes when the hardware cooperates. But bathrooms are humid environments, and metal bolts sitting in porcelain holes for years rarely stay cooperative. If the nut resists your first attempt or the bolt just spins without loosening, stop before you strip the threads and move to the next approach.
Dealing With Rusted or Seized Bolts That Will Not Budge
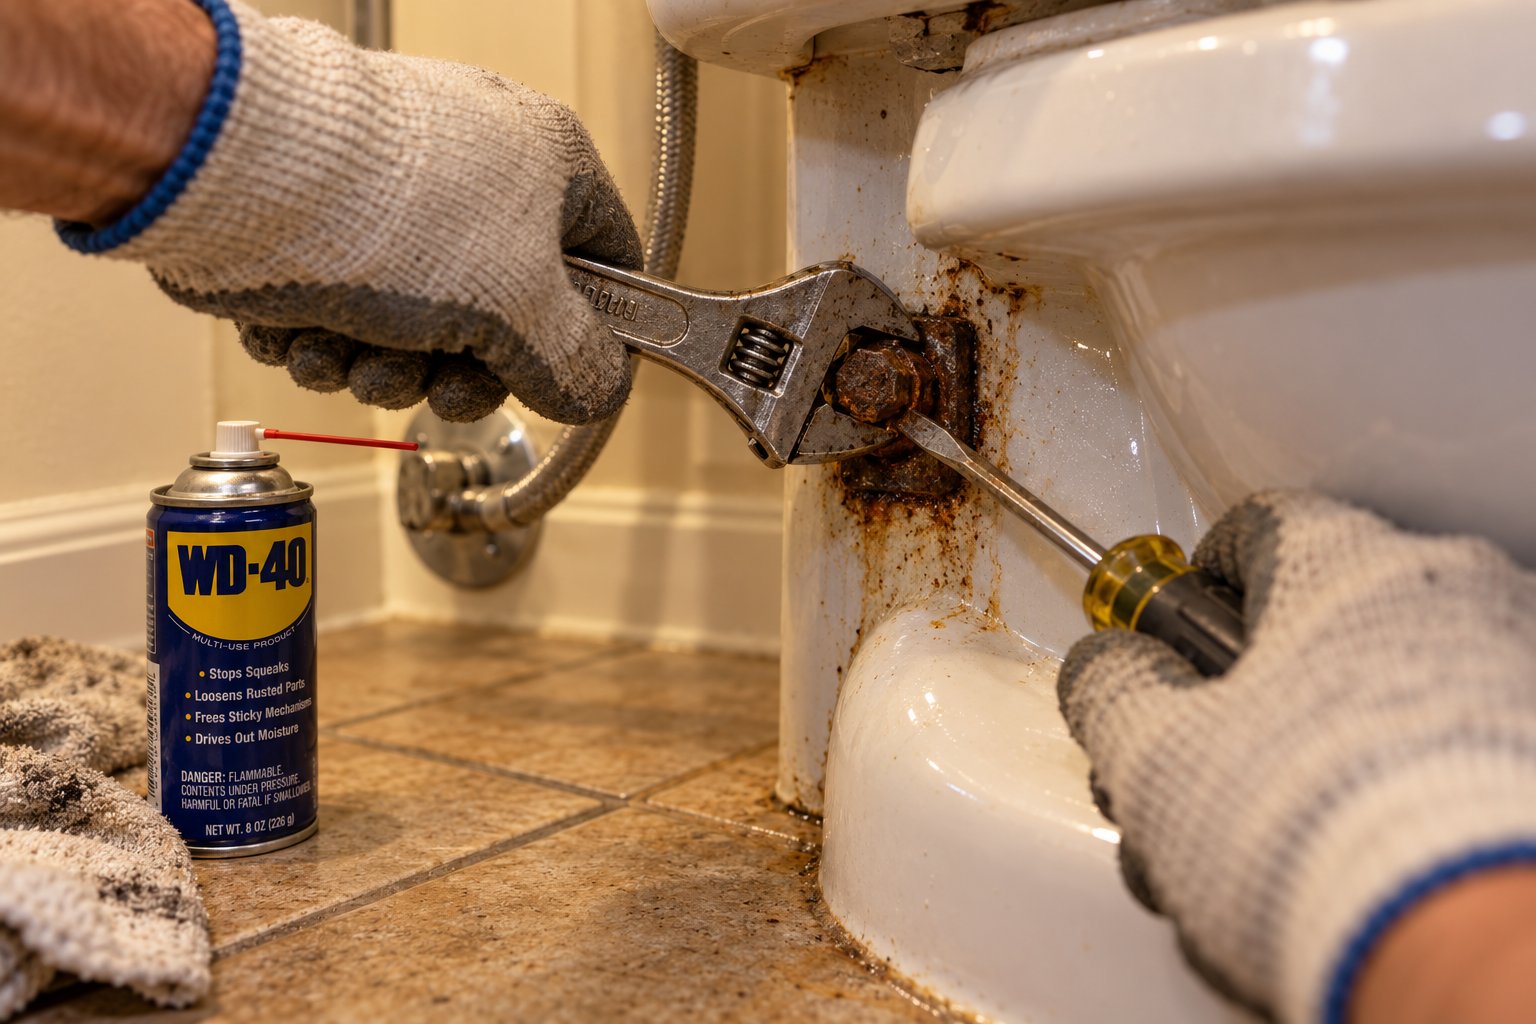
Corroded toilet seat bolts are far more common than most people expect. Moisture, condensation, and cleaning product residue attack exposed metal relentlessly. One homeowner documented the experience vividly, noting that a five-minute seat swap turned into a multi-day project because the rusted screws refused to budge. You do not need to spend days on this. Work through the following methods in order, escalating only as needed.
1. Apply penetrating oil liberally and wait.
Spray a generous amount of penetrating oil (WD-40, PB Blaster, or a similar product) onto both the bolt head from above and the nut from below. Let it soak for at least 15 to 20 minutes. For heavily corroded bolts, reapply and wait a full hour or even overnight. The oil seeps into the micro-gaps between the threads and dissolves rust just enough to break the bond. Professional plumber feedback suggests penetrating oil resolves roughly 60 percent of seized-bolt situations without any further intervention.
2. Use pliers or a locking wrench for extra grip.
After the oil has done its work, try again. This time, clamp a locking wrench (vise grip) onto the nut below the bowl while you hold or turn the bolt head from above. The locking wrench provides a two-point grip that bare fingers or a standard wrench cannot match. Rock the nut back and forth slightly, just a few degrees in each direction, to crack the rust seal before attempting a full counter-clockwise turn.
3. Cut through metal bolts with a hacksaw or oscillating multi-tool.
When the bolt is completely frozen and no amount of lubricant or torque will free it, cutting is the safest next step. A mini hacksaw fits into the tight space between the bolt and the porcelain bowl. Position the blade against the bolt just below the hinge and saw with slow, steady strokes. An oscillating multi-tool with a metal-cutting blade is even faster. Move the blade side to side as you cut to spread the load across the teeth, reduce friction, and extend blade life. Protect the porcelain surface around the bolt with a strip of thick tape to prevent accidental scratches from the saw or tool housing.
4. Snap plastic bolts as a last resort.
Some older seats use plastic mounting bolts that corrode differently. They do not rust, but mineral deposits can cement them into the hole. If a plastic bolt will not turn, grip the nut with pliers and apply a firm upward twist to snap the bolt shaft. Plastic is brittle enough to break cleanly once enough force is applied. Be deliberate, not violent: a sharp, controlled twist is safer than repeated yanking.
Safety tip: never hammer directly on porcelain. A single misplaced blow can crack the bowl beyond repair. Always rely on tool-based cutting or lubricant methods to free seized bolts.
Whichever method gets the job done, set the old bolts aside so you can compare their length and diameter to the new mounting hardware. This quick comparison confirms compatibility and flags any sizing issues before you discover them mid-installation.
Once the old seat is off, disposal is straightforward. Most old toilet seats, whether plastic, wood, or composite, can go in general household waste. Check your local waste authority's website if you are unsure; a few municipalities classify bulky plastic items as recyclable, but the majority treat them as standard trash.
With the old seat removed and the bowl exposed, you will likely notice grime, mineral buildup, and possibly rust stains around the bolt holes. That buildup is exactly why the next step, cleaning and inspecting the mounting surface, is more important than it looks.
Step 4 - Clean the Mounting Surface and Inspect the Porcelain
That exposed rear rim probably does not look pretty right now. Years of being hidden under a toilet seat allow grime, mineral deposits, old wax residue, and rust stains to accumulate in and around the bolt holes without anyone noticing. It is easy to skip this step and bolt the new seat straight on, but doing so is a mistake. Debris trapped between the new hardware and the porcelain prevents the seat from sitting flush, creates tiny gaps where bacteria thrive, and stops rubber gaskets from forming a proper seal. Five minutes of cleaning here saves you from a wobbly, unhygienic result that will bother you every time you sit down.
How to Clean the Bolt Holes and Rim Surface
You do not need specialty products for this. A standard bathroom-safe cleaning spray and a bit of elbow grease will handle the job:
- Spray the rear rim area generously. Focus on the flat surface surrounding both bolt holes, the inside walls of the holes themselves, and the curved underside of the rim where buildup tends to concentrate. Use a mild cleaner or soap rather than abrasive or bleach-heavy products, which can dull vitreous china and damage rubber seals in your new mounting kit.
- Scrub with a cloth or old toothbrush. A toothbrush is perfect for reaching inside the bolt holes, where crusty mineral deposits love to hide. Work in small circular motions and pay extra attention to any orange or brown rust rings left behind by the old metal bolts.
- Wipe everything dry with a clean cloth. Moisture left on the porcelain can prevent adhesive rubber bumpers from sticking and may cause new metal hardware to begin corroding from day one.
- Inspect for chips or cracks. Run your fingertip around the rim of each bolt hole and across the flat mounting surface. You are feeling for rough edges, small chips, or hairline cracks that were invisible under the old seat.
If mineral scale inside the bolt holes is stubborn enough to resist scrubbing, a brief soak helps. Dampen a paper towel with white vinegar, stuff it into the hole, and let it sit for ten to fifteen minutes. The mild acidity loosens calcium and lime deposits so they wipe away cleanly.
Checking for Bowl Damage Before Installing
Why does a tiny chip matter? When you tighten the new mounting bolts, the hardware applies concentrated downward pressure on the porcelain around each hole. A chip or hairline crack near that pressure point acts like a stress riser, meaning the force is no longer distributed evenly. Over weeks or months of use, that small defect can spread into a visible crack or, in a worst case, cause a piece of the rim to break away entirely.
Addressing damage now is simple and inexpensive. A two-part epoxy porcelain repair kit costs under twenty dollars and takes only a few minutes to apply. Clean the chipped area thoroughly, mix the epoxy compound according to the kit directions, press it into the damaged spot, and let it cure fully before installing the new seat. The hardened epoxy restores a smooth, solid surface that distributes bolt pressure safely.
Even if the porcelain looks perfect, remember the practical payoff of this step: a clean, dry mounting surface allows the rubber gaskets and washers in your new hardware kit to compress evenly against the bowl. That even compression is what eliminates side-to-side wobble and blocks moisture from seeping down through the bolt holes. It is a small habit that separates a rock-solid installation from one that loosens within a few weeks.
With a spotless, damage-free surface ready to receive the new hardware, the seat itself can finally go on, and proper alignment during this next step is what makes the soft close mechanism perform exactly as designed.
Step 5 - Install the New Soft Close Toilet Seat on Your Bowl
Everything up to this point has been preparation. The bowl is clean, the porcelain is intact, and every tool and piece of hardware is within arm's reach. This is the step where the new seat actually goes on, and getting the alignment right from the first bolt drop determines whether the soft close mechanism operates smoothly or fights against itself every time you lower the lid.
The good news? The universal installation process is nearly identical across brands. A Danze round soft close toilet seat installation follows the same fundamental sequence as a Caroma soft close toilet seat installation. Where brands diverge is in the hinge mounting style, and those differences are easy to handle once you know what to look for.
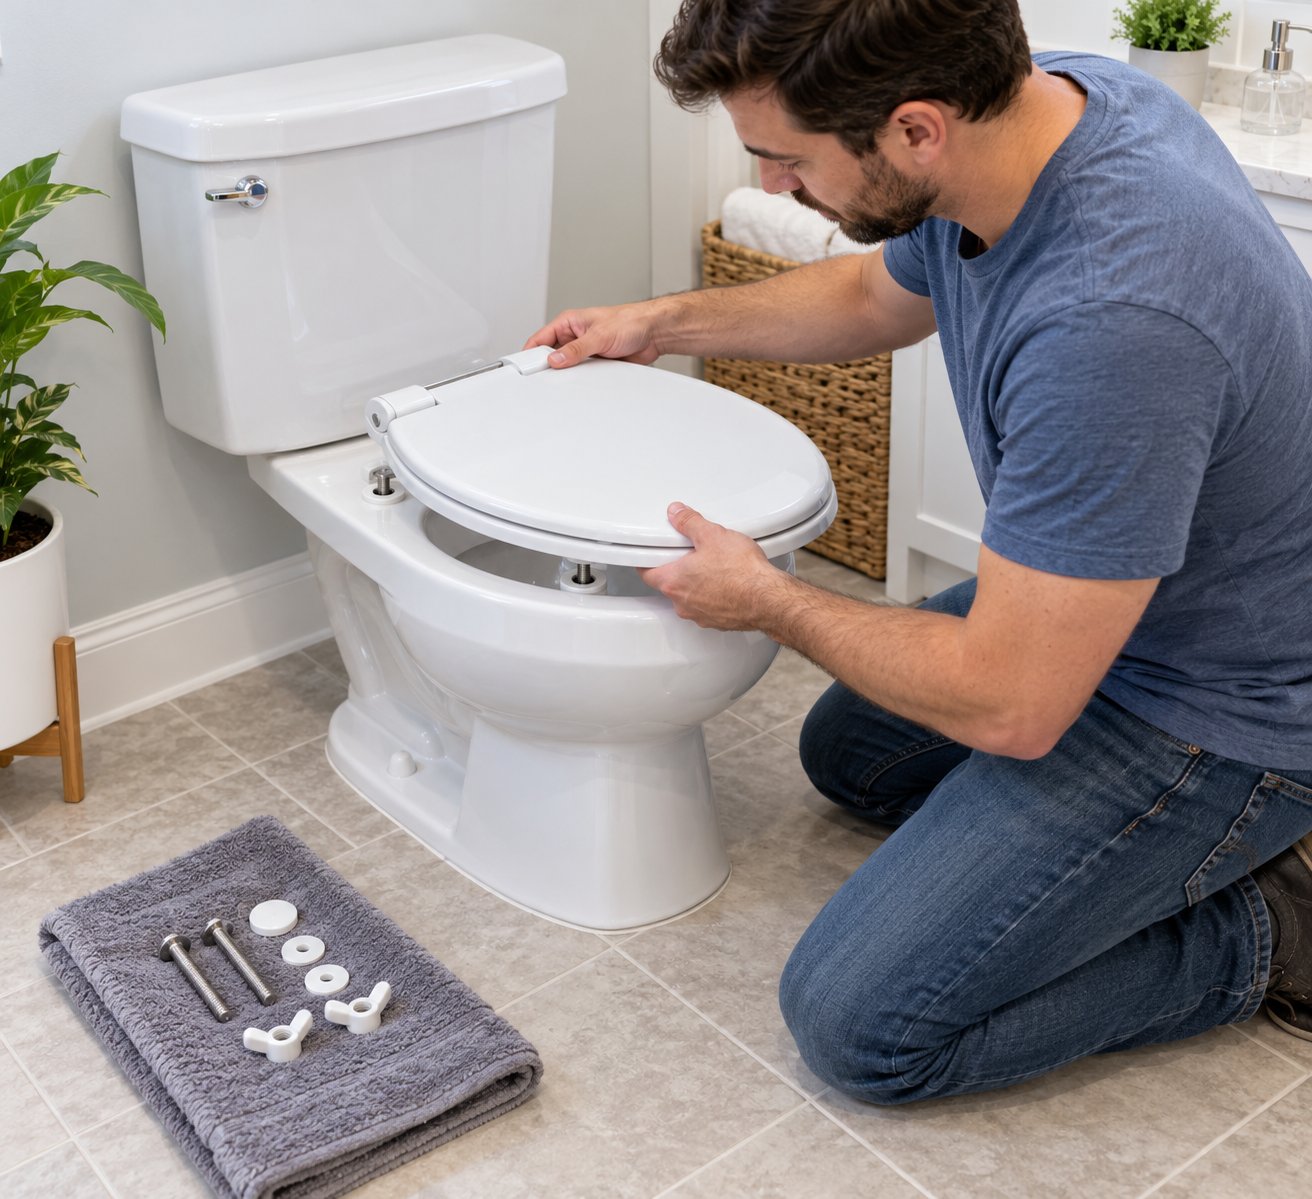
Universal Soft Close Seat Installation Steps
Regardless of the brand on the box, this core procedure applies to the vast majority of soft close seats sold today. Work through each step in order, and resist the urge to rush the final tightening.
- Position the seat on the bowl. Set the entire seat assembly (lid, seat ring, and attached hinges) onto the toilet so the hinge bolt holes line up directly over the bowl's mounting holes. The front edge of the seat should be roughly centered and parallel with the front rim of the bowl.
- Drop the mounting bolts through from above. Insert one bolt through the left hinge and down into the corresponding bowl hole, then repeat on the right side. Let the bolts hang loosely for now.
- Move underneath and thread on the washers and wing nuts. Reach below the back of the bowl rim. Slide a washer onto each bolt (if your kit includes bottom washers), then hand-thread a wing nut or tightening knob onto each bolt. Turn clockwise until the nut makes light contact with the underside of the porcelain. Do not tighten yet.
- Slide the seat forward, backward, and side to side to center it. Because the bolts are only finger-tight, the seat can still shift. Gently reposition the entire assembly until the seat ring sits symmetrically on the bowl rim with even overhang on both sides and at the front. This centering step is critical: a seat that is even slightly off-center puts uneven stress on the hinges and can cause the soft close damper to bind.
- Snug the bolts evenly using quarter-turns. Here is where patience pays off. Give the left wing nut a quarter-turn clockwise with your wrench, then switch to the right wing nut and do the same. Alternate back and forth, a quarter-turn at a time, keeping the pressure equal on both sides. This alternating technique prevents the seat from pulling to one side and ensures the hinge bodies press flat against the bowl surface.
- Stop when snug. You will feel the resistance increase as the washers compress against the porcelain. The seat should no longer slide or rock when you push it sideways. That is your signal to stop tightening. One final quarter-turn beyond "snug" is the absolute maximum.
- Attach adhesive rubber bumper pads. Most kits include small rubber pads that stick to the underside of the seat ring. Press them firmly onto the marked spots (or space them evenly along the bottom of the ring if no marks are present). These bumpers cushion the seat's contact with the porcelain rim, reduce noise, and prevent micro-sliding during daily use.
- Test the seat. Open the lid to about 45 degrees and let go. It should descend slowly and close without slamming. Sit gently on the seat and shift your weight slightly from side to side. Zero wobble is the goal.
If the seat feels solid and the lid closes silently, you have nailed the installation. But if you are working with a Kohler ReadyLock, a TOTO SoftClose, or a Bemis soft close toilet seat installation kit, you will notice the hinge mounting method differs from the universal bottom-fix approach described above. These brand-specific variations are straightforward once you understand what makes each system unique.
Brand-Specific Tips for Kohler, TOTO, and Bemis Seats
The universal steps cover about 80 percent of the seats on the market. The remaining 20 percent use proprietary mounting designs that speed up installation or eliminate the need to reach underneath the bowl. Here is how the most popular systems differ:
Kohler ReadyLock (Top-Mount System)
Kohler's ReadyLock hinges are designed so you never have to fumble under the bowl rim. Instead of a bolt-and-wing-nut combination, each hinge uses an expanding anchor. You insert the anchor into the bowl's bolt hole from above, then turn a top-accessible screw clockwise. As the screw tightens, the lower portion of the anchor expands outward inside the hole, locking the hinge firmly in place. The entire process happens from a standing or kneeling position above the toilet, making a Kohler elongated toilet seat soft close installation noticeably faster and more comfortable than a traditional bottom-fix setup. Just be sure to tighten both sides evenly, the same alternating quarter-turn principle applies.
TOTO SoftClose (Mounting Plate + Click-Fit)
TOTO takes a two-stage approach. First, you secure a separate mounting plate to the bowl using bolts and nuts (following the universal steps above). The plate stays permanently attached. Then, the seat assembly clicks onto the plate's mounting posts with a firm downward press. You will hear or feel a distinct click when the seat locks in. This click-fit design makes the Bemis soft close toilet seat installation on a TOTO one piece toilet straightforward as well, since TOTO's plate dimensions are compatible with many Bemis replacement seats of the same bowl shape. To remove the seat later for cleaning, press the release buttons on the hinges and lift straight up, leaving the plate in place.
Bemis (Conventional Bottom-Fix)
Bemis seats typically stay closer to the classic installation method. Two plastic bolts pass through the hinge bodies and down through the bowl holes, secured from below with plastic wing nuts. The plastic hardware is lightweight and corrosion-proof, but it is also more prone to thread stripping if you overtighten. Hand-tighten the wing nuts first, center the seat, then use gentle wrench pressure, no more than a quarter-turn past firm finger-tight, to lock everything down.
Other brands, including Caroma, Roca, and some Danze models, generally follow either the bottom-fix or top-mount pattern described above. Always check the instruction sheet packed inside your specific seat box for any model-specific torque guidance or click-fit confirmation steps. If the sheet specifies a maximum torque value (usually expressed in Newton-meters), use a torque-limiting screwdriver if you have one. Most homeowners will not, and that is perfectly fine: the "snug plus one quarter-turn" rule delivers comparable results by feel.
Key rule: tighten until snug, then stop. Overtightening is the single fastest way to crack porcelain or strip plastic threads, and both outcomes turn a ten-minute job into an expensive repair.
A properly mounted seat that sits centered, wobble-free, and level is the foundation for reliable soft close performance. Still, even a perfect installation can feel "off" if the hinge tension needs a small adjustment, and that fine-tuning step is something most installation guides never mention.
Step 6 - Adjust the Soft Close Mechanism and Test for Smooth Operation
You have followed every elongated soft close toilet seat installation instruction to the letter, the bolts are snug, the seat is centered, and you are ready for that satisfying silent close. Then you lower the lid and... it slams. Or maybe the opposite happens: the lid creeps down at a glacial pace and will not stay upright when you lift it. Either scenario is surprisingly common, and neither means you installed the seat incorrectly. The soft close mechanism simply needs a small adjustment, a step that most guides skip entirely.
Think of the damped hinge like a door closer on a commercial building entrance. The hardware is installed correctly, but someone still needs to dial in the closing speed. The same logic applies to your toilet seat. A few targeted tweaks turn a frustrating first impression into the whisper-quiet operation you paid for.
What to Do if the Seat Still Slams Shut
A seat that slams despite having soft close hinges points to one of a few mechanical issues. Work through these checks in order before assuming the hinge is defective:
- Verify the hinge pins are fully seated. Some soft close hinges ship with the pin slightly retracted to protect the mechanism during transit. Push each hinge pin firmly inward until it clicks or sits flush with the hinge body. An unseated pin means the internal damper cylinder never engages, so the lid free-falls just like a standard seat.
- Check the damper cylinder orientation. Certain models, particularly those found in a Danze soft close toilet seat installation manual, are orientation-sensitive. The damper cylinder must be installed with a specific side facing up or toward the bowl. If you inserted it upside down, the fluid chamber inside cannot create the resistance needed to slow the descent. Remove the hinge, rotate the damper 180 degrees, and reinstall.
- Confirm the mounting bolts are tight enough. A hinge body that shifts even slightly on the bowl surface cannot transfer rotational force into the damper. Gently try to wiggle each hinge with your fingers. If it moves, tighten the corresponding bolt another quarter-turn. The hinge base must sit flat and firm against the porcelain so the damping mechanism can do its job.
- Look for an adjustable tension screw. Higher-end soft close seats, including some Danze and Kohler models, feature a small tension screw on the side or back of each hinge. If present, turn it clockwise in small increments, roughly an eighth of a turn at a time, to increase the resistance. Test the lid after each adjustment. You are aiming for a controlled descent that takes roughly five to eight seconds from a 45-degree angle to fully closed.
After each change, open the lid to about halfway and release it. Watch the descent carefully. A correctly adjusted hinge produces a smooth, even deceleration with no sudden drop in the final inch before contact.
Adjusting Hinge Tension and Ensuring Proper Alignment
Sometimes the lid closes quietly, but the seat ring itself wobbles, shifts to one side, or makes a faint clicking noise during use. These alignment issues are almost always fixable without removing the seat entirely.
- Loosen both mounting bolts by a half-turn. This gives the seat just enough play to reposition without falling off the bowl.
- Re-center the seat. Stand in front of the toilet and look down. The seat ring should have equal overhang on the left and right sides of the bowl rim, and the front curve of the seat should mirror the front curve of the bowl. Nudge the assembly gently until everything looks symmetrical.
- Retighten evenly. Alternate quarter-turns on each side, exactly as you did during installation. Uneven bolt tension is the most common cause of a seat that drifts back out of alignment within days.
- Apply or reposition the rubber bumper pads. If the seat wobbles side to side even when the bolts are properly snug, the rubber bumpers on the underside of the seat ring are either missing, misplaced, or compressed flat. Peel off any old bumpers, clean the contact points with rubbing alcohol, and press fresh pads firmly into place. These small pads stabilize the seat's contact with the rim and absorb the micro-movements that cause annoying rattling sounds.
Once you are satisfied with the alignment, open and close both the lid and the seat ring independently at least five or six times. Listen for any scraping, clicking, or uneven movement. A well-adjusted soft close seat should glide down silently every single time. If the damper feels noticeably stiff during the first few days, that is perfectly normal. The silicone fluid inside the hinge needs a brief break-in period, and most users find the closing speed smooths out naturally within the first week of regular use.
There is one scenario, however, where no amount of adjustment will fix the problem: a faulty or incompatible hinge mechanism. If the damper does not engage regardless of orientation, or if the hinge body does not sit flat because the mounting holes are slightly offset, the issue lives in the hardware itself, not in your technique. Replacing the entire seat in that situation is expensive and wasteful when only the mounting assembly needs to change.
Tianyun's Toilet Seat Fixing Systems offer compatible hinge mounting kits and custom fixing options built to restore proper alignment and soft close function without replacing the seat. Their stainless steel bases and purpose-designed assemblies fit a wide range of bowl configurations, giving you a durable, corrosion-resistant foundation that addresses the root cause rather than masking a hardware mismatch with repeated readjustment.
If adjustments do not resolve slamming or wobbling after two or three attempts, the hinge hardware is likely the culprit - replace the mounting assembly, not the entire seat.
A seat that closes silently and sits rock-solid is a great finish line, but a handful of common installation mistakes can quietly undermine that result over time. Knowing what those pitfalls are, and how to fix them quickly, keeps your soft close seat performing exactly as it should for years to come.
Step 7 - Avoid These Common Mistakes and Fix Problems Fast
Even experienced DIYers stumble over the same handful of errors when installing a soft close toilet seat. The frustrating part? Most of these mistakes do not show up immediately. A seat might feel perfectly solid on day one, then start wobbling, creaking, or sliding within a few weeks because a small detail was overlooked during setup. This section pulls every common pitfall and its fix into one place, so you can troubleshoot quickly or, better yet, avoid the problem entirely.
Common Mistakes That Lead to a Wobbly or Noisy Seat
Bookmark this table. It covers the five issues that account for the vast majority of post-installation complaints, whether you are working with an Estilo Serena soft close toilet seat installation, an Estilo soft close toilet seat installation, or a seat from any other brand. The causes and fixes are universal.
| Mistake | Why It Happens | How to Fix It |
|---|---|---|
| Overtightening the mounting bolts | It feels logical to crank the bolts as tight as possible for maximum stability. But porcelain is brittle, and plastic wing nut threads are soft. Excessive force can crack the bowl rim or strip the threads completely, leaving the bolt spinning freely without gripping anything. | Loosen both bolts, inspect the porcelain and nut threads for damage, then retighten to snug only - firm finger-tight plus one quarter-turn with a wrench. If threads are already stripped, replace the wing nut or the entire bolt set before retightening. |
| Skipping surface cleaning before installation | Old grime, mineral scale, and rust residue create an uneven layer between the hardware and the porcelain. The seat cannot sit flush, rubber gaskets cannot seal, and the assembly gradually loosens as debris compresses unevenly under bolt pressure. | Remove the seat, clean the bolt holes and surrounding rim with bathroom spray and a toothbrush, wipe dry, then reinstall. This eliminates one of the most common causes of a sliding seat and takes under five minutes. |
| Choosing the wrong seat shape | A round seat on an elongated bowl leaves a visible gap at the front and puts the hinge bolts under diagonal stress. An elongated seat on a round bowl overhangs the rim and wobbles because the mounting geometry does not match. | Measure from the bolt-hole center to the front rim before ordering. Round bowls measure approximately 16.5 inches; elongated bowls roughly 18.5 inches. If the seat shape is wrong, no amount of adjustment will fix the fit - return and reorder the correct version. |
| Not alternating bolt tightening | Tightening one bolt fully before touching the other pulls the seat toward that side. The hinge on the opposite side lifts slightly off the porcelain, creating a pivot point that lets the seat rock and drift out of alignment during use. | Loosen both bolts until the seat can shift freely. Re-center the assembly, then alternate quarter-turns on each side until both are equally snug. This balanced approach keeps the seat symmetrical and the hinges flat against the bowl. |
| Ignoring rubber bumper pads | Without bumpers, the hard underside of the seat ring rests directly on smooth porcelain. There is almost zero friction, so the seat slides laterally with even light body movement. You also get that annoying porcelain-on-porcelain tap every time the seat is lowered. | Attach the adhesive bumper pads included in your mounting kit to the underside of the seat ring. If original bumpers are missing or flattened, inexpensive universal replacement pads are available at any hardware store. Clean the contact spots with rubbing alcohol first so the adhesive bonds properly. |
If your seat developed a problem weeks or months after installation, scan the table above before assuming the hinge mechanism has failed. In most cases, one of these five issues is the real culprit, and the fix takes less time than diagnosing it did.
Troubleshooting Misaligned Bolt Holes and Stripped Threads
Two problems deserve extra attention because they can make you think the seat itself is defective when the real issue is hardware-related.
Bolt holes that do not line up. You drop the bolts through the hinges, lower them toward the bowl, and the bolt tips miss the holes by a few millimeters. Before you panic, double-check the seat shape. A mismatch between round and elongated is the number-one reason bolt holes appear misaligned. If the shape is correct, look at your mounting system. Many top-fix and Ideal Standard soft close toilet seat installation instructions describe sliding brackets or slotted base plates that accommodate slight positional offsets. Loosen the bracket screws, slide the hinge body forward or backward until the bolts drop cleanly into the holes, and then lock the bracket in place. This adjustability is one of the key advantages of plate-style mounting systems over rigid one-piece hinges.
Stripped wing nut threads. A wing nut that spins endlessly without tightening has had its internal threads destroyed, usually from overtightening during a previous installation. Forcing it further only shaves away more material and guarantees the bolt will never hold. The fix is simple: replace the wing nut. If the bolt threads are also damaged, swap the entire bolt-and-nut pair. Mixing a fresh nut onto a chewed-up bolt creates a false sense of tightness that will fail under load. Keep a spare set of mounting bolts and nuts with your bathroom toolkit so a stripped fastener never stalls an installation again.
Approaching these issues methodically, rather than muscling through them, protects both the porcelain and the soft close mechanism. A seat that is installed correctly and free of these common errors will reward you with years of quiet, stable performance. And speaking of years, a little routine maintenance is what separates a seat that stays whisper-quiet from one that gradually loses its soft close magic.
Step 8 - Keep Your Soft Close Seat Working Perfectly for Years
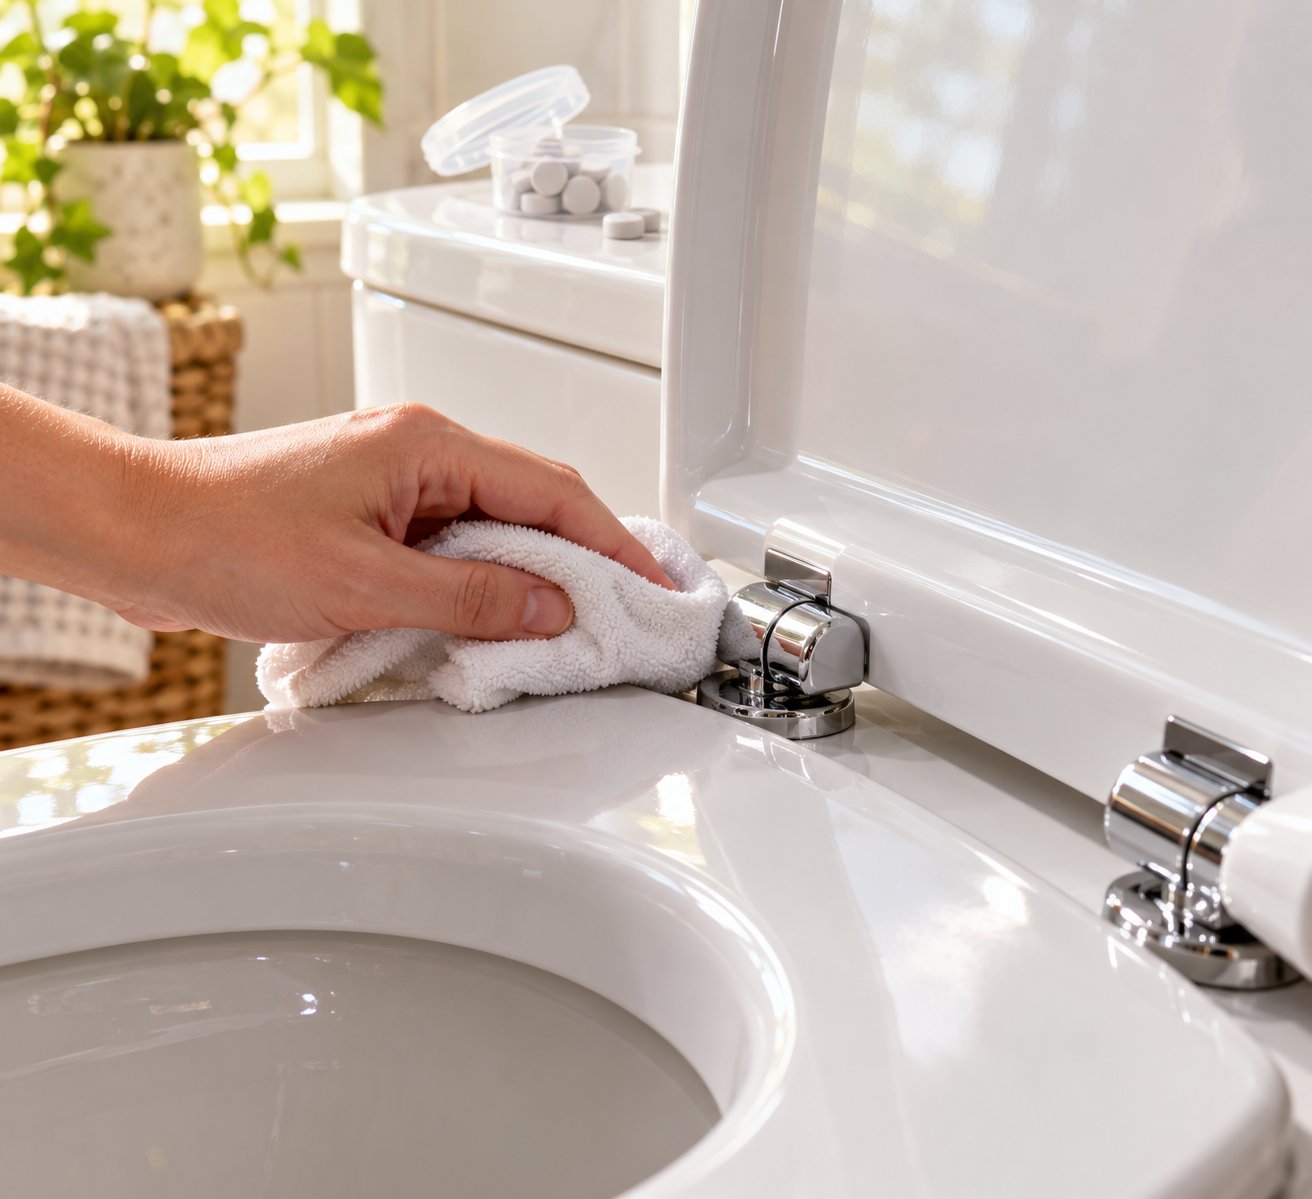
A soft close seat that works flawlessly on installation day can gradually lose its whisper-quiet close over the following months - not because anything is broken, but because nobody bothered to spend five minutes checking on it. Dirt creeps into hinges. Bolts loosen a fraction of a turn from daily use. Rubber bumpers flatten under repeated compression. Each issue is tiny on its own, but together they erode performance until one morning the lid drops with a thud and you wonder what went wrong.
The answer is almost always deferred maintenance. And the good news? Keeping your soft close seat in top condition requires less effort than cleaning the bathroom mirror.
Monthly and Quarterly Maintenance Routine
You do not need a calendar reminder or a toolbox for this. A damp cloth and two spare minutes once a month handle most of it. Here is the full routine, broken into monthly and quarterly tasks:
- Wipe the hinges with a damp cloth (monthly). Bathroom humidity, dust, and splashed cleaning products gradually coat the hinge mechanism with a sticky residue. Left unchecked, that grime works its way into the damper pivot and increases friction, causing creaking or uneven closing speed. A quick wipe around and behind each hinge body prevents buildup before it becomes a problem. Avoid spraying cleaning products directly into the hinge - moisture inside the damper housing can dilute the silicone fluid and reduce its effectiveness.
- Check bolt tightness (quarterly). Every three months, grip the seat ring with both hands and try to shift it gently from side to side. If you feel any movement at all, the mounting bolts have loosened slightly. Snug them back up with a quarter-turn on each side, alternating left and right just as you did during installation. This ten-second check catches loosening long before it turns into a wobbly, noisy seat.
- Inspect rubber bumper pads for wear (quarterly). Flip the lid up and look at the small adhesive pads on the underside of the seat ring. Fresh bumpers are soft and slightly raised. Worn bumpers look visibly compressed, shiny, or peeled at the edges. Flattened bumpers no longer cushion the seat against the porcelain rim, which reintroduces sliding and that familiar porcelain-on-porcelain tap. Peel off any degraded pads, clean the spot with rubbing alcohol, and press on replacements. Universal bumper pads cost next to nothing at any hardware store.
- Avoid slamming the seat manually. This sounds obvious, but it is the single fastest way to shorten hinge life. Every time someone pushes the lid down forcefully instead of letting the damper do its job, the internal cylinder absorbs a spike of pressure it was not designed for. Over hundreds of forced slams, the seals inside the damper weaken, the silicone fluid leaks or loses viscosity, and the soft close function fades prematurely. A gentle nudge to start the descent is all the mechanism needs - gravity and the damper handle the rest.
That is the entire routine. Four tasks, roughly five minutes per quarter, and your seat stays as quiet as the day you installed it.
When to Replace Hinges vs the Entire Seat
Here is something most people do not realize: when the soft close function fades after a few years, the seat itself is almost never the problem. The lid is still structurally sound. The seat ring has no cracks. The finish looks fine. What has worn out is the damper mechanism inside the hinge, that small cylinder of silicone fluid that creates the controlled resistance during closing. After roughly 40,000 to 55,000 open-and-close cycles, the internal seals degrade and the fluid loses its ability to slow the descent effectively.
Replacing the entire seat at that point is wasteful and unnecessarily expensive. A far smarter approach is to replace just the hinge assembly or the mounting hardware. Many manufacturers sell replacement hinge kits for their specific models, and universal soft close hinge sets fit a wide range of seat styles. Installing a fresh hinge set on an otherwise perfect seat restores full soft close performance, extends the seat's usable life by several more years, and keeps a perfectly good piece of bathroom hardware out of a landfill.
How do you know the hinge is the issue and not something else? Two reliable signs:
- The lid descends faster than it used to, despite the bolts being tight and the hinges clean. The damper fluid has lost viscosity.
- You hear a faint clicking or grinding inside the hinge body during closing. The internal seals have worn through and the cylinder is no longer creating smooth resistance.
If either symptom appears, swap the hinges first. If the new hinges restore silent operation, you have confirmed the diagnosis and saved yourself the cost of a full replacement seat.
A five-minute quarterly check keeps your soft close seat working for years and avoids a full replacement - protect the damper, maintain the bolts, and replace only the hinges when performance eventually fades.
That brings the entire process full circle. You started by measuring your bowl and identifying the correct seat shape. You gathered tools, verified the mounting hardware, and removed the old seat - rusted bolts and all. You cleaned the porcelain, installed the new seat with careful bolt alignment, adjusted the soft close mechanism for smooth operation, and learned how to sidestep the mistakes that trip up most installers. With this maintenance routine in your back pocket, installing a soft close toilet seat is not just a one-afternoon project. It is a long-term upgrade that stays quiet, stable, and hassle-free for years to come.
Frequently Asked Questions About Installing a Soft Close Toilet Seat
1. Can I install a soft close toilet seat on any toilet?
Most soft close seats fit standard toilets as long as you match the correct bowl shape (round, elongated, or D-shape) and verify the bolt-hole spacing, which is typically 5.5 inches or 140 mm center-to-center. Measure from the center of the bolt holes to the front rim of your bowl before purchasing. Round bowls measure roughly 16.5 inches while elongated bowls sit around 18.5 inches. D-shape bowls, common in European and Australian bathrooms, vary more widely, so checking the manufacturer's specifications is essential. If your existing hardware is missing or incompatible, sourcing a compatible fixing system such as Tianyun's Toilet Seat Fixing Systems can provide hinge mounting kits and stainless steel bases that work across a wide range of bowl configurations.
2. How do I remove old toilet seat bolts that are rusted and won't turn?
Start by spraying penetrating oil such as WD-40 or PB Blaster onto both the bolt head and the wing nut, then wait 15 to 20 minutes for the lubricant to break down the corrosion. For heavily rusted fasteners, reapply and wait up to an hour or overnight. If the bolt still won't budge, clamp a locking wrench onto the nut for better grip and rock it back and forth to crack the rust seal. When all else fails, use a mini hacksaw or oscillating multi-tool with a metal-cutting blade to saw through the bolt below the hinge. Protect the porcelain with thick tape during cutting, and never hammer directly on the bowl since a single misplaced strike can crack it beyond repair.
3. Why does my new soft close toilet seat still slam shut after installation?
A seat that slams despite soft close hinges usually has a mechanical issue that is easy to correct. First, check that the hinge pins are fully seated, as some ship retracted for transit protection and need a firm push inward to engage the damper. Next, verify the damper cylinder orientation because certain models are direction-sensitive and must face a specific way. Also confirm the mounting bolts are tight enough to hold the hinge body firmly against the bowl. Some higher-end models include an adjustable tension screw on the hinge; turning it clockwise in small increments increases resistance. If none of these fixes work, the hinge mechanism itself may be faulty, and replacing the mounting assembly through a compatible fixing system is often more cost-effective than buying an entirely new seat.
4. How often should I maintain a soft close toilet seat to keep it working properly?
A simple monthly and quarterly routine keeps performance consistent for years. Once a month, wipe the hinge bodies with a damp cloth to prevent grime from working into the damper pivot. Every three months, gently try to shift the seat side to side to check for bolt looseness and retighten with alternating quarter-turns if needed. At the same time, inspect the adhesive rubber bumper pads on the underside of the seat ring and replace any that look flattened or peeled. Avoid forcing the lid down manually, as repeated hard slams degrade the internal silicone damper far faster than normal use. This five-minute quarterly check prevents gradual performance loss and delays the need for hinge replacement.
5. Should I replace the entire soft close seat or just the hinges when the slow-close function stops working?
In most cases, the seat lid and ring are still perfectly functional when the soft close effect fades. The worn component is almost always the damper mechanism inside the hinge, which typically lasts 40,000 to 55,000 cycles before the internal seals degrade and the silicone fluid loses viscosity. Two telltale signs point to hinge failure: the lid descends noticeably faster than it used to despite tight bolts, or you hear faint clicking or grinding inside the hinge body during closing. Replacing just the hinge assembly or mounting hardware restores full soft close performance, extends the seat's lifespan by several years, and avoids unnecessary waste. Tianyun's Toilet Seat Fixing Systems offer compatible hinge mounting kits and custom fixing assemblies designed to restore alignment and function across a wide range of seat styles.
Apply This Insight to Your Project
Tell us what you are building and how the topic “How To Put A Soft Close Toilet Seat On (Rusted Bolts? No Problem)” relates to your application. Our engineering team can help evaluate the next step.


