

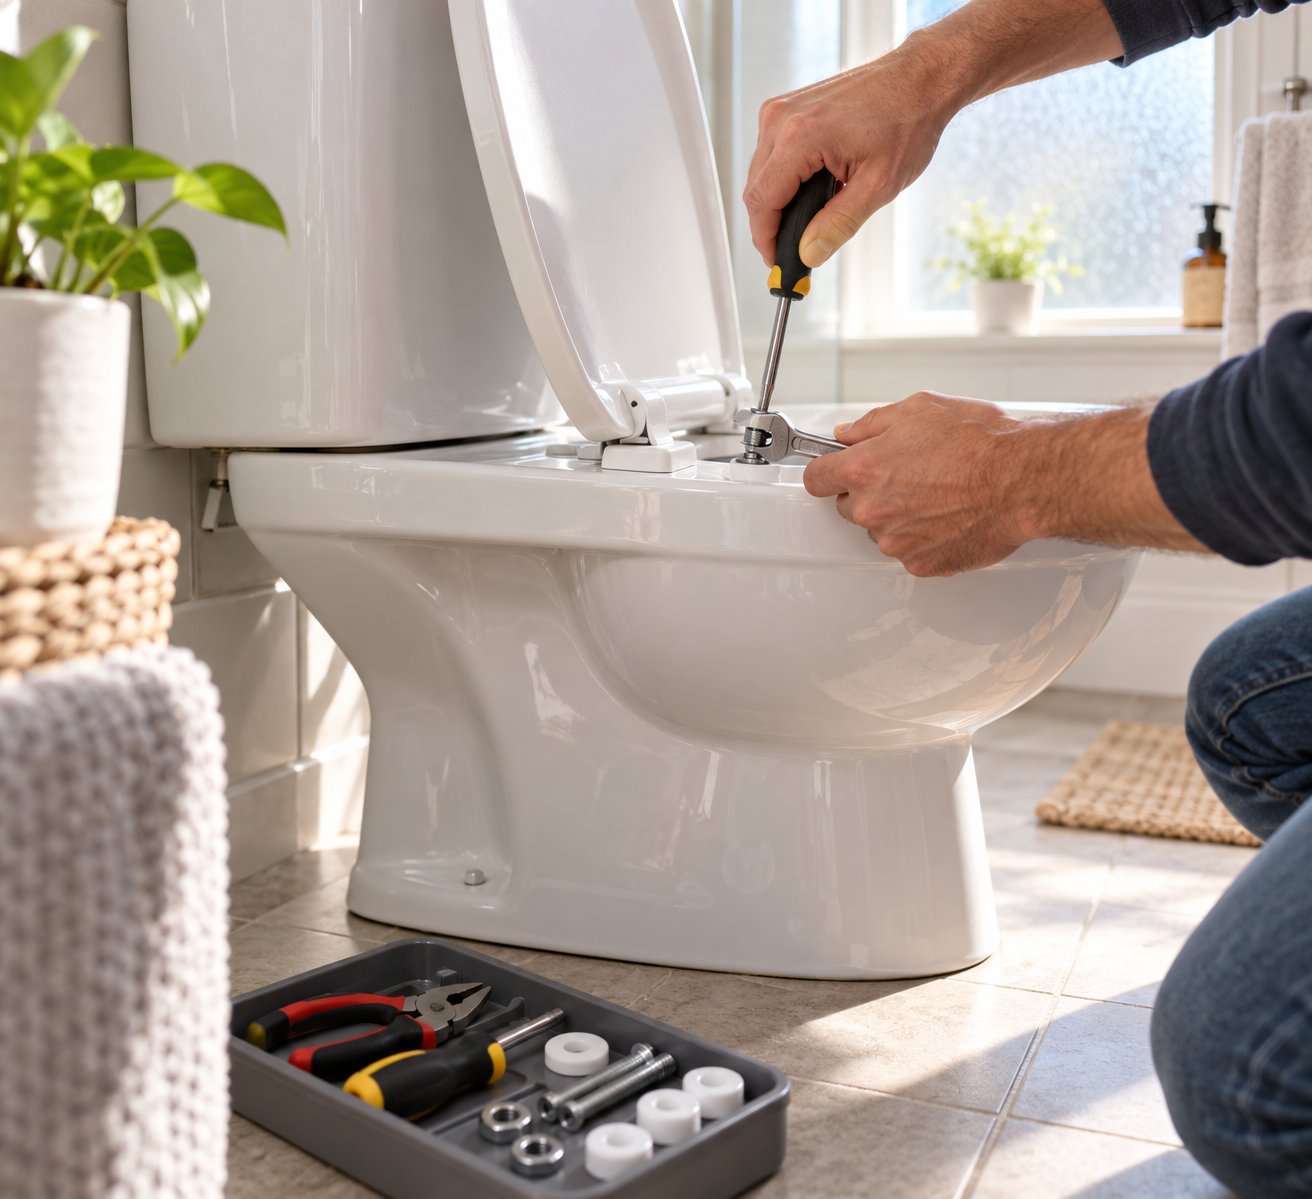
Diagnose Your Toilet Seat Problem Before Picking Up a Tool
When you search "how do you fix a toilet seat," you probably expect a straight answer. Instead, most guides jump directly into one narrow fix—usually tightening a couple of bolts—and ignore the dozen other things that can go wrong. A wobbly seat, a cracked hinge, and a rusted bolt that spins in place are completely different problems, and each one calls for a different repair. Grabbing a screwdriver before you know what you're dealing with can waste your afternoon or, worse, crack your porcelain bowl.
This guide works differently. Think of it as a quick triage: match your symptom below to the right section, skip the steps that don't apply, and get back to a stable seat in the shortest time possible.
Identify Your Specific Toilet Seat Problem
Before you learn how to take a toilet seat off or reach for any tools, run through this checklist. Each symptom points to a distinct root cause—and a targeted fix later in the article:
- Seat wobbles side to side — Loose mounting bolts or worn rubber bumpers. (See: Tightening a Loose Seat and Stopping a Sliding Seat)
- Seat slides forward or backward — Missing anti-slide pads or oversized mounting holes. (See: Stopping a Sliding Seat)
- Seat is cracked or chipped — Structural damage that may need epoxy or full replacement. (See: When to Repair vs. Replace)
- Hinge is broken or detached — Failed hinge pin or snapped plastic bracket. (See: Soft-Close Hinges and Quick-Release Seats)
- Lid won't stay up — Often a soft-close damper stuck in "always closing" mode, not necessarily a broken part. (See: Soft-Close Hinge Repair)
- Soft-close mechanism has failed — Internal damper fluid leak or seized piston. (See: Soft-Close Hinge Repair)
- Bolts are rusted or spinning freely — Corroded hardware or stripped threads that require removal tactics before any tightening. (See: Removing Rusted or Stuck Bolts)
If your issue doesn't appear on the list, you likely need a full toilet seat cover change—but even then, understanding how to remove toilet seat hardware without damaging the bowl saves time and money during the swap.
Why Most Toilet Seat Problems Don't Require a Full Replacement
Here's the part that surprises most homeowners: the majority of toilet seat complaints boil down to loose bolts or worn-out washers. A universal tightening kit costs roughly $3 to $10, and the repair itself typically takes under 30 minutes. Contrast that with buying a brand-new seat—$25 to $80 or more—for a problem that never required a replacement in the first place.
Even issues that sound serious, like a bolt spinning endlessly or a seat that keeps loosening every few weeks, usually trace back to a compressed rubber washer or a stripped nut rather than a defective seat. Knowing how to replace toilet seat hardware at the bolt level is far more cost-effective than swapping the entire assembly.
Identify the symptom first, then apply the targeted repair. A five-second diagnosis saves you from buying parts you don't need and skipping steps that actually matter.
This guide covers every common fix—not just one. From simple tightening and concealed-fixing systems to cutting through rusted bolts and choosing durable replacement hardware, each section ahead matches a specific problem on the checklist above. The right repair starts with the right diagnosis, and the right diagnosis starts with knowing exactly which tools to grab.
Tools You Need for Every Type of Toilet Seat Fix
A single "grab these tools" list rarely helps because a loose-bolt tightening and a rusted-bolt removal are entirely different jobs. Imagine reaching under the bowl with an adjustable wrench only to realize you actually need a hacksaw—frustrating and avoidable. The smarter approach is matching your tools to the specific problem you diagnosed above.
Basic Tightening and Adjustment Tools
For a straightforward loose seat—the most common reason people look up how to change toilet seat hardware—you'll need surprisingly little:
- Flathead and Phillips screwdrivers — One of these fits nearly every exposed bolt cap and bolt head.
- Adjustable wrench or pliers — Essential for gripping the wing nut underneath the bowl while you turn the bolt from above.
- Dedicated toilet-seat wrench — This slim, deep-socket tool slides into tight spaces between the bowl and the wall far more easily than standard pliers. If you plan to install a toilet seat yourself more than once, it's worth the few dollars.
Tools for Stubborn and Corroded Hardware
Bathroom humidity accelerates corrosion, especially on zinc-plated steel bolts. When tightening alone fails, you'll need to escalate:
- Penetrating oil (e.g., WD-40 or PB Blaster) — Soak rusted bolts and wait 15 to 20 minutes before attempting removal.
- Hacksaw or oscillating multi-tool — For bolts that refuse to turn, cutting through the shaft between the bowl and the nut is often the fastest solution.
- Locking pliers (Vise-Grips) — Clamp onto a spinning nut from below so the bolt above can finally gain traction.
Eye protection and a strip of painter's tape over the porcelain near the cut line prevent scratches and flying metal fragments.
Specialty Tools for Modern Seat Mechanisms
Wondering how to remove a toilet seat that has no visible bolts at all? Concealed-fixing and quick-release models are increasingly common, and they often skip traditional hardware entirely. You may only need:
- A flat plastic key (usually included with the seat) to unlock slide-rail channels.
- A small Allen wrench (hex key) for grub screws recessed inside the hinge barrel.
The table below maps each problem type to its required tools and a rough cost estimate so you can gather everything before you start.
| Problem Type | Required Tools | Approximate Cost |
|---|---|---|
| Loose or wobbly seat (standard bolts) | Screwdriver, adjustable wrench or pliers | $0 – $8 (if not already owned) |
| Rusted or seized bolts | Penetrating oil, hacksaw or oscillating tool, locking pliers, eye protection | $8 – $25 |
| Stripped or spinning bolts | Locking pliers, replacement bolt kit | $5 – $12 |
| Concealed-fixing or quick-release seat | Allen wrench set or flat plastic key | $0 – $6 |
| Cracked seat (temporary stabilization) | Waterproof epoxy, clamp or tape | $5 – $10 |
With the right tools laid out and organized by repair type, the actual hands-on work goes remarkably fast. The most common fix—a simple bolt tightening—is exactly where the real step-by-step action begins.
How to Tighten a Loose or Wobbly Toilet Seat
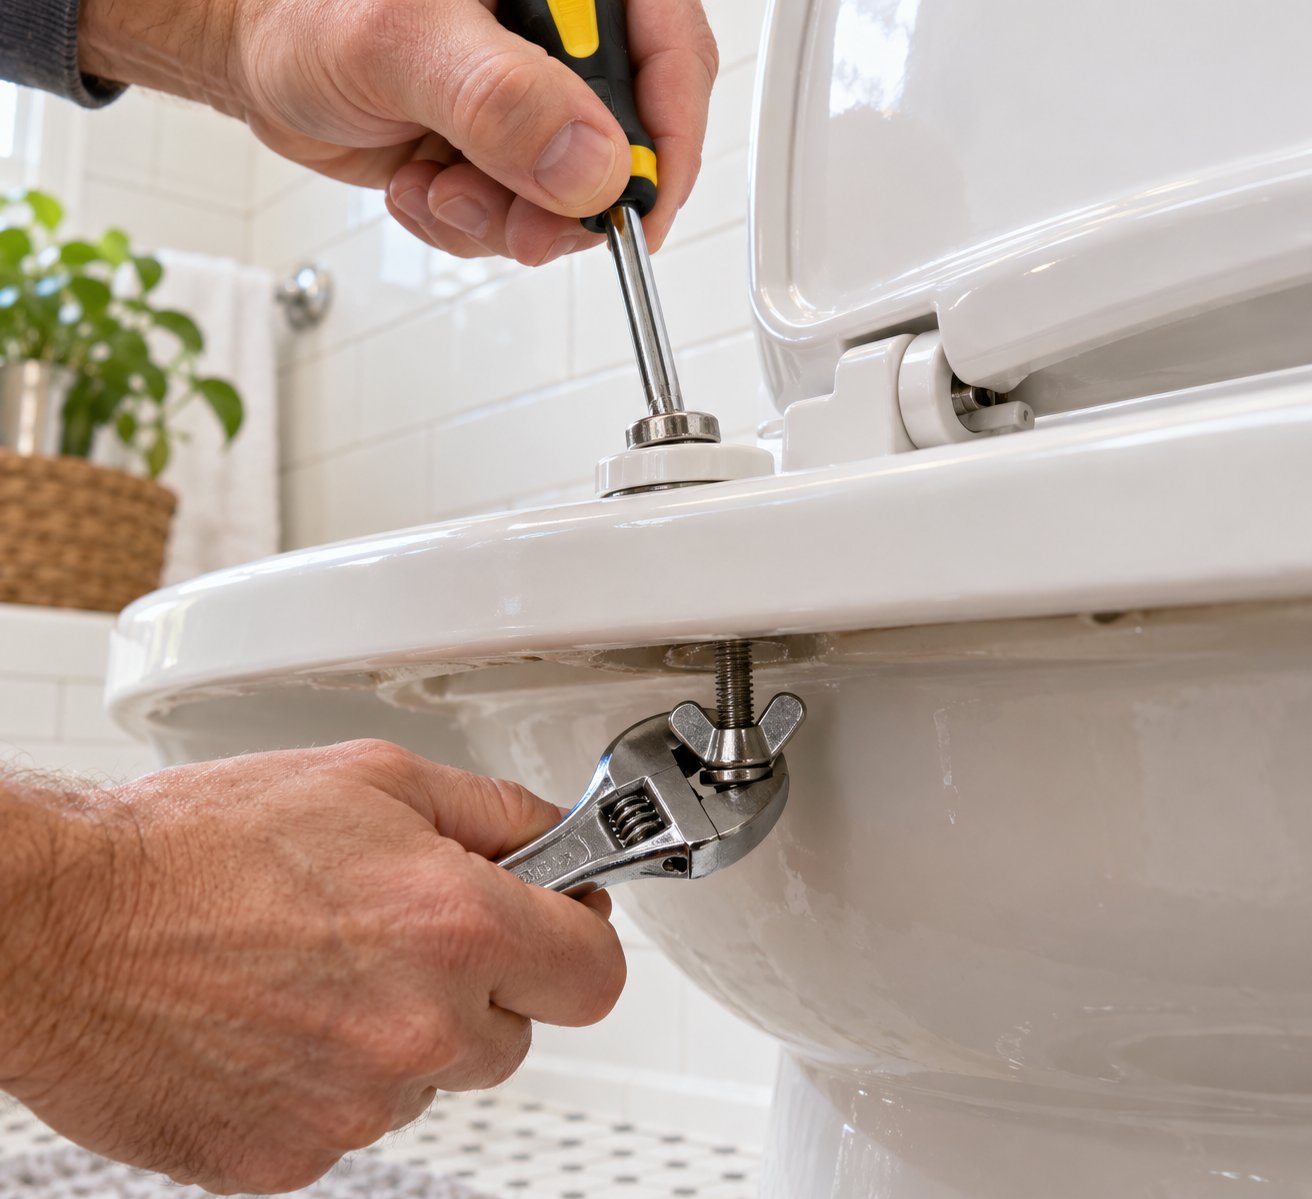
A seat that shifts every time you sit down is the single most common toilet seat complaint—and, fortunately, the easiest to resolve. Whether your hardware uses classic exposed bolts or a newer top-access tightening design, the fix rarely takes longer than ten minutes. The key is understanding exactly where the fasteners live, how snug they need to be, and what to do when simple tightening fails to hold.
Locating and Accessing the Seat Bolts
Every toilet seat attaches to the bowl through two mounting holes near the back of the rim. The bolts hiding inside those holes are the reason your seat stays put—or doesn't. Here's how to find and expose them:
- Lift the seat and lid fully upright. Look at the area where the hinges meet the porcelain. You'll typically see two small plastic covers (bolt caps) sitting directly over the mounting holes.
- Flip open or pry off the bolt caps. Most caps have a small notch along the back edge. Slide a flathead screwdriver or your fingernail under that notch and pop the cap upward. Some caps simply snap up on a hinge of their own.
- Identify your bolt type. With the caps open, look at the bolt heads. If you see a Phillips or flathead screw slot, you have a standard system that tightens from the top while a nut secures it from below. If you see a hex socket or a wide plastic dial, you likely have a top-mount tightening system where everything is adjusted from above—no need to reach underneath.
- Inspect the bolt condition. Before you grab a wrench, take two seconds to check for visible rust, corrosion, or cracks in the bolt or the plastic washer beneath it. Corroded hardware needs a different approach than a bolt that's simply loose, so catching this now saves a false start.
If you've been wondering how to take toilet seat off hardware without breaking anything, this inspection step is exactly where that process begins—you need to see what you're working with before applying any force.
Step-by-Step Tightening for Standard Bolt Seats
Standard bottom-mount bolts are still the most widespread design. A bolt drops through the hinge, passes through the porcelain mounting hole, and threads into a wing nut or hex nut underneath the bowl. Tightening is straightforward once you know the two-person shortcut—and the solo workaround.
Two-Person Method (Fastest)
- One person positions a screwdriver in the bolt head from above and holds it firmly so the bolt cannot spin.
- The second person reaches underneath the bowl and turns the wing nut clockwise by hand until it feels snug against the porcelain.
- Give the nut one final quarter-turn with an adjustable wrench—just enough to eliminate any play in the seat.
- Repeat on the opposite bolt, then test by gently rocking the seat side to side.
Solo Method
No helper available? No problem. Grip the nut underneath with locking pliers or a standard pair of pliers so it can't spin, then tighten the bolt from above with your screwdriver. Alternate between the left and right bolts a little at a time—similar to tightening lug nuts on a wheel—so the seat draws down evenly and stays centered.
How tight should toilet bolts be? The answer is firm but never forced. You want zero wobble when you push the seat sideways, yet the bolt should stop turning with moderate hand pressure on the wrench. A useful rule of thumb: hand-tighten the nut first, then add no more than a quarter-turn with a tool. Porcelain is strong under compression but surprisingly brittle under point loads, and an over-torqued bolt concentrates pressure right at the edge of the mounting hole.
Never force a toilet seat bolt past firm resistance. Over-tightening can crack the porcelain bowl—turning a five-minute fix into a full toilet replacement that costs hundreds of dollars.
For top-mount tightening systems, the process is even simpler. Insert a screwdriver or Allen key into the bolt head from above and turn clockwise. The bolt threads into an expanding rubber or plastic anchor beneath the bowl, so it draws tight without anyone holding a nut below. You'll feel the anchor grip the underside of the porcelain; stop turning the moment resistance increases sharply.
When Tightening Alone Does Not Work
Sometimes you'll crank the bolt and feel it spin endlessly without getting any tighter. That's a clear signal that something beyond simple looseness is going on. Before you assume you need to change a toilet seat entirely, work through these likely culprits in order:
- Check for a spinning nut. If the nut below rotates with the bolt above, neither one gains traction. Have someone hold the nut with pliers underneath—or clamp locking pliers onto it—while you turn the bolt from the top.
- Inspect the rubber washer. Pull the bolt out and look at the rubber or nylon washer that sits between the nut and the porcelain. Over months of compression, this washer can flatten completely, losing the friction that keeps everything snug. A replacement washer costs pennies and is included in most universal mounting kits.
- Look for stripped threads. Run the nut along the bolt by hand. If it glides without catching, the threads are stripped. Swap the bolt and nut—not the entire seat. A stainless steel replacement bolt set typically runs $5 to $10 and eliminates the problem for years.
- Test the mounting holes. Rarely, the porcelain holes themselves are chipped or slightly enlarged from repeated overtightening. Rubber bushing inserts placed inside the hole give the bolt a fresh surface to clamp against and restore a solid grip.
If your toilet seat won't stay up while you're working on the bolts, prop the lid against the tank with a rolled towel. A lid that keeps falling forward isn't just annoying—it can shift the seat mid-repair and throw off your alignment. Persistent lid drop is often a sign the soft-close damper has drifted into "always closing" mode, a separate issue covered later in this guide.
In most cases, a fresh washer or bolt swap restores a rock-solid seat without spending a dollar more than necessary. The real variable, though, is the mounting system itself. Top-mount and bottom-mount designs fail in fundamentally different ways—and knowing which one you have changes the entire repair approach.
Top-Mount vs Bottom-Mount Bolt Systems Explained
That bolt you just tried to tighten—or couldn't budge at all—belongs to one of two fundamentally different fixing systems. Each one attaches the seat to the bowl through a completely different mechanism, which means the steps for toilet seat repair, removal, and retightening diverge right at the start. Treating one like the other is a fast track to stripped threads or a snapped anchor. A quick identification saves you that headache.
How to Identify a Top-Mount Fixing System
Reach underneath the back of the bowl, right below the hinge area. Feel nothing? No protruding bolt, no wing nut, no washer? You almost certainly have a top-mount (also called top-fix) system. These are standard on wall-hung and back-to-wall toilets, but they also show up on many freestanding models.
Here's how the mechanism works: a bolt feeds down through the seat hinge and into the porcelain mounting hole. At the bolt's lower end sits an expanding rubber or plastic anchor. As you turn the bolt clockwise from above, that anchor mushrooms outward and grips the inside of the hole, locking everything in place—no hardware underneath required.
To retighten or remove a top-mount seat, the entire job happens from above:
- Flip open the bolt caps on the hinge.
- Insert a screwdriver or Allen key into the bolt head.
- Turn clockwise to tighten. You'll feel resistance ramp up sharply once the anchor engages—stop there.
- To remove, turn counterclockwise until the anchor releases, then lift the seat straight off.
If you've been wondering how to unscrew a toilet seat that has no visible nuts below, this is almost always the reason. The anchor does all the holding internally, so there's simply nothing to grip from underneath.
How Bottom-Mount Bolts Work and When They Fail
Traditional bottom-mount systems take the opposite approach. A bolt passes through the hinge bracket, drops through the porcelain hole, and is secured from below with a washer and a wing nut—or sometimes a standard hex nut. This is the classic setup found on most open-back toilets, and it's the design most homeowners picture when they ask how do you remove a toilet seat.
Bottom-mount hardware is simple, but it sits in the worst possible environment. Constant humidity, occasional splashes, and condensation dripping down the bolt all accelerate corrosion. The most common failure points include:
- Corroded wing nuts — Zinc-plated steel rusts within a year or two in a damp bathroom, fusing the nut to the bolt.
- Compressed rubber washers — The rubber gasket between the nut and the porcelain flattens over time, eliminating the friction that keeps the bolt from loosening.
- Misaligned bolt holes — A replacement seat with slightly different hinge spacing forces the bolts to sit at an angle, creating uneven pressure and persistent wobble.
Understanding which system you have determines exactly how do you fix a toilet seat that keeps loosening—and whether you'll work exclusively from above or need to get both hands below the rim. The comparison below lays the differences out side by side.
| Feature | Top-Mount | Bottom-Mount |
|---|---|---|
| Identification Clue | No visible hardware underneath the bowl rim | Bolt, washer, and wing nut visible below the rim |
| Tightening Method | Screwdriver or Allen key from above; expanding anchor grips internally | Hold nut below with pliers; turn bolt from above |
| Common Failure | Rubber anchor splits or loses grip inside the mounting hole | Wing nut corrodes; rubber washer compresses flat |
| Typical Hardware Included | Bolt, expanding rubber/plastic anchor, decorative cap | Bolt, flat washer, rubber gasket, wing nut, bolt cap |
When you need to source replacement mounting assemblies—rather than hunting for individual bolts, washers, and anchors separately—look for kits that bundle compatible components for both configurations. Tianyun's Toilet Seat Fixing Systems offer hinge mounting kits and stainless steel bases designed for sanitary ware manufacturers and sourcing teams, supporting both top-mount and bottom-mount configurations in a single product line. Stainless steel construction is especially worth noting here: it directly addresses the corrosion problem that causes most bottom-mount failures in the first place.
Knowing how do you tighten a toilet seat on each system is half the battle. The other half? Dealing with seats that hide their hardware entirely—concealed-fixing designs where there are no bolt caps to flip and no nuts to reach. Those require a different inspection process altogether.
Fixing a Toilet Seat with Concealed or Hidden Fixings
You've flipped the seat up, run your fingers along the hinges, and found... nothing. No bolt caps, no visible screws, no wing nuts peeking out below. It feels like the seat is glued to the bowl. This is exactly the frustration that sends thousands of homeowners down a search rabbit hole, because most repair guides assume you can see your hardware. Concealed-fixing seats are increasingly common on modern toilets—especially sleek, European-style designs and wall-hung models—yet the actual process for tightening or removing them is barely documented.
The good news? Every concealed-fix seat has an access point. It's just hidden by design. Once you know the three main concealed-fixing styles and how to identify which one is on your toilet, the repair is no more complicated than a standard bolt tightening.
Finding the Hidden Access Points on Concealed-Fix Seats
Concealed fixings fall into three primary designs. You can identify yours through a quick visual and tactile inspection—no tools required at this stage:
- Push-button release on the hinge cover: Look for a small button, often circular and recessed, on the top or back face of each hinge housing. Pressing this button retracts an internal locking tab and lets the entire seat lift straight off the mounting posts. The posts themselves remain bolted to the bowl, and those posts are where the tightening happens. If you spot a button, you have a quick-release concealed system.
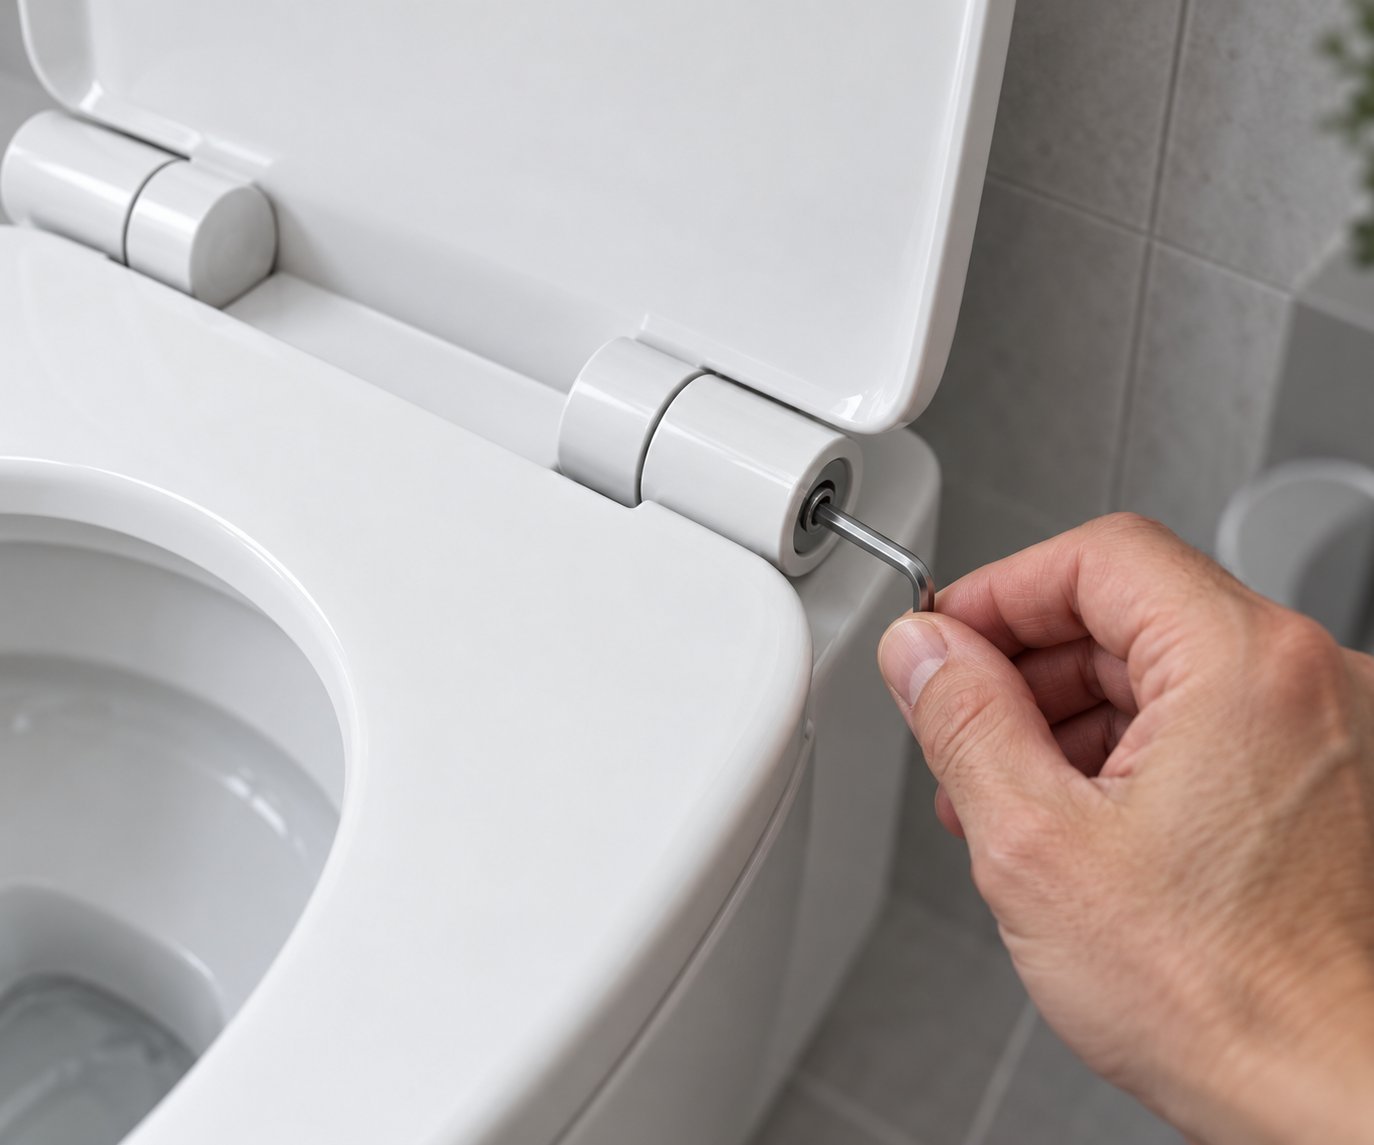
- Allen-key grub screws inside the hinge barrel: Run your finger along the underside or inner edge of the hinge cylinder. A tiny hex-socket set screw—sometimes no larger than 3 mm—is recessed into the barrel. This screw clamps the hinge onto the mounting rod. When it loosens, the seat wobbles or slides even though nothing looks visibly wrong from above.
- Slide-lock channels: Some concealed-fix seats sit on a flat base plate screwed directly to the porcelain. The seat clicks onto the plate via plastic rails or guide tracks. To remove the seat, you lift it to a specific angle (often straight up or tilted slightly back) and slide it off the rails. The base plate screws are hidden beneath the seat when it's in position, making them invisible during normal use.
Not sure which type you have? Try this 30-second test: press firmly on any raised area near each hinge while lifting the seat. If it releases, you have a push-button system. If nothing moves, look for a tiny hex hole with a flashlight. Still nothing? Try lifting the seat straight up with firm, even pressure—it may be sitting on slide-lock rails that disengage at a particular angle.
Tightening Concealed Fixings Without Damage
Concealed-fix hardware is almost always plastic or a plastic-and-metal hybrid. That makes it quieter and more resistant to corrosion than exposed steel bolts, but it also means the components are far less tolerant of brute force. Forcing a concealed-fix seat can snap plastic retainer clips, crack decorative hinge covers, or shear off a grub screw flush with the barrel—turning a simple tightening into a full hinge replacement.
Follow these steps based on the design you identified:
- For push-button release seats: Press both buttons and lift the seat off the mounting posts. Inspect the base of each post where it meets the porcelain. You'll typically find a bolt head (Phillips, flathead, or hex) that can be tightened from above. Turn clockwise a quarter-turn at a time, alternating sides, until the posts feel solid against the rim. Snap the seat back onto the posts and test for wobble.
- For Allen-key grub screws: Insert the correct-size Allen wrench (commonly 3 mm or 4 mm) into the recessed screw and turn clockwise gently. These screws only need to be finger-tight with the wrench—they clamp a hinge sleeve onto a rod, so a small amount of torque goes a long way. Over-tightening strips the tiny hex socket instantly.
- For slide-lock channel seats: Lift the seat off the base plate entirely. Clean any debris or grime from the rail channels—accumulated residue here is the most frequent cause of a loose-feeling seat on this design. Then check the base plate screws. If they've loosened, tighten them with the appropriate screwdriver. Slide the seat back onto the rails until you hear or feel it click into the locked position.
- For all types: After retightening, sit on the seat and shift your weight gently side to side. If there's still lateral play, repeat the tightening process. Persistent movement after multiple attempts usually means a cracked retainer clip or a worn rail groove—at that point, you're looking at how to fix a broken toilet seat hinge rather than a simple adjustment.
Never pry concealed-fix hinge covers with a metal screwdriver or putty knife. The plastic cracks easily under point pressure, and replacement covers are often sold only as part of a full hinge assembly. Use a plastic trim-removal tool or even a credit card edge to pop decorative caps free.
One more option worth knowing about: if your concealed-fix seat wobbles slightly but you'd rather not dismantle toilet seat hardware at all, toilet seat stabilizers can solve the problem from the outside. These are small rubber gasket pads that stick between the underside of the hinge plate and the porcelain surface. They fill the micro-gap that allows lateral movement and add friction that keeps the seat planted. For many homeowners learning how to fix a loose toilet seat on a concealed-fix design, stabilizers are the fastest, zero-disassembly solution—especially when the hinge hardware itself is still in good condition and the wobble is minor.
Concealed fixings keep the look clean, but they share one vulnerability with every other mounting system: if the bolts, anchors, or screws corrode or seize, you'll need to remove them before any repair can happen. Rust and corrosion are an entirely different obstacle—and they call for an escalating set of tactics that go well beyond a screwdriver.
How to Remove Rusted, Stripped, or Stuck Toilet Seat Bolts
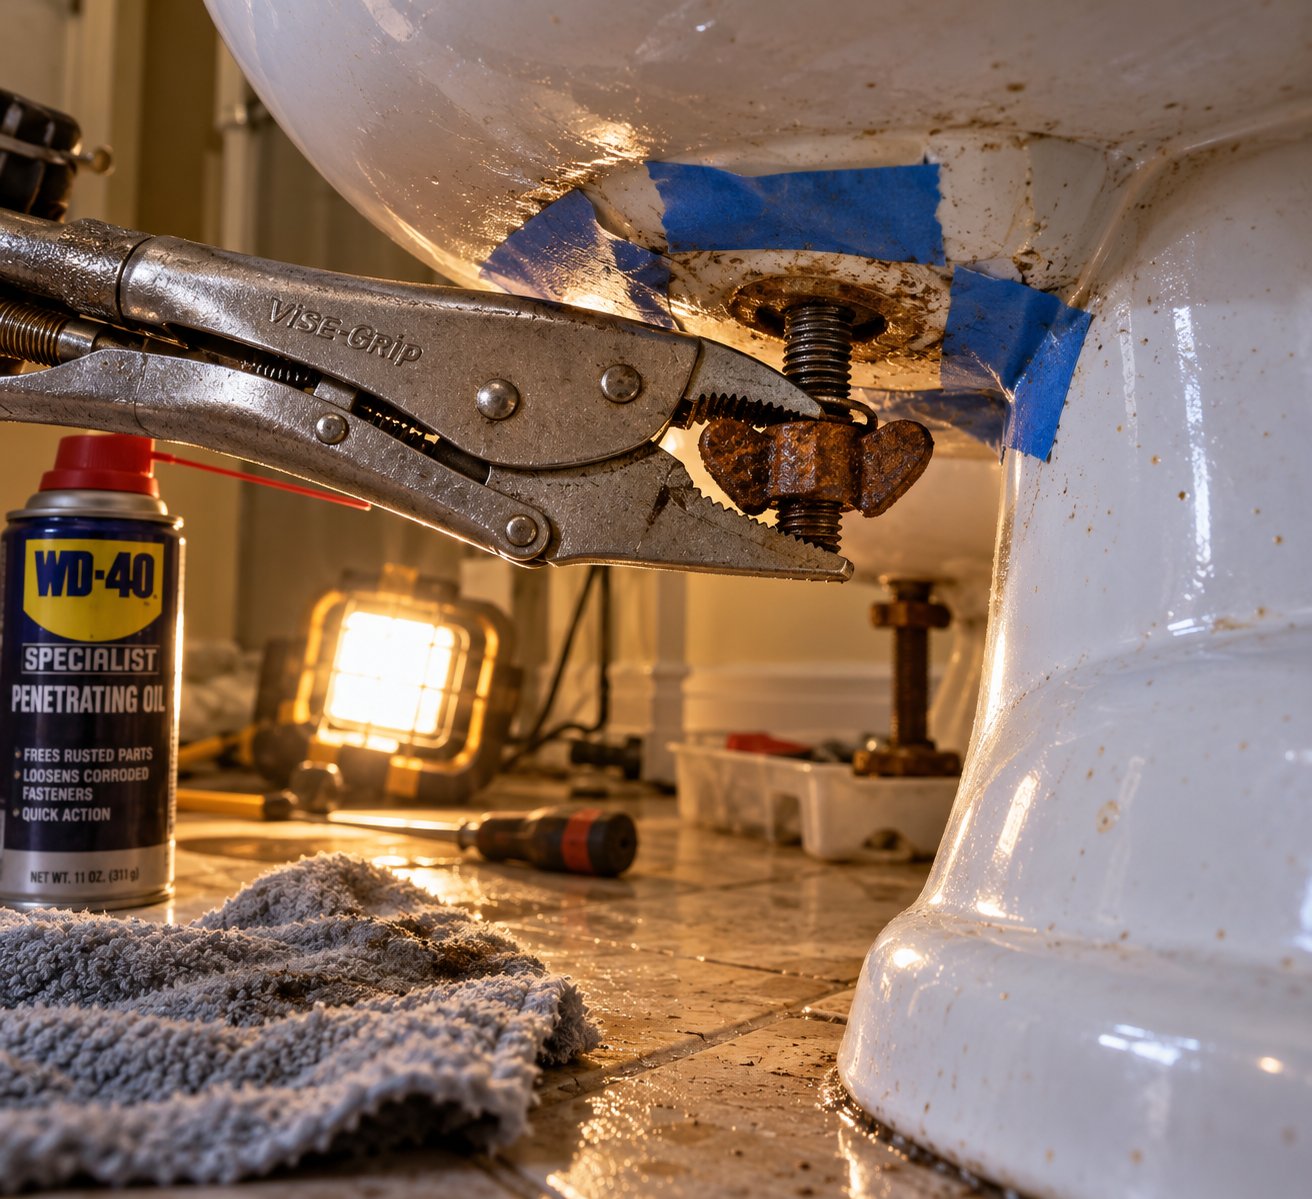
Rust is the single biggest reason a simple toilet seat repair turns into a frustrating ordeal. You know the bolt needs to come off—maybe to replace toilet seat hardware, maybe just to retighten it—but the nut won't budge, the bolt head is chewed up, and every twist of the wrench produces nothing but knuckle pain. Bathroom humidity is the culprit. Warm, moisture-laden air condenses on metal hardware almost every time someone showers, and that constant wet-dry cycle accelerates corrosion far faster than most homeowners expect—especially on zinc-plated steel bolts, which can fuse solid within just a year or two.
The temptation is to grab a bigger wrench and muscle through it. Resist that urge. Forcing a corroded bolt against porcelain concentrates enormous pressure right at the edge of the mounting hole, and cracked porcelain is an irreversible, expensive problem. Instead, work through these methods in escalating order, starting with the gentlest approach and moving to more aggressive tactics only as needed.
Loosening Rusted or Corroded Toilet Seat Bolts
Penetrating oil is your first line of attack, and it works in roughly 60 percent of cases when applied correctly. Here's how to give it the best chance of success:
- Expose the bolt and nut fully. Pop open the bolt caps on top and, if you can reach underneath, wipe away any visible grime around the wing nut or hex nut with a rag. Corrosion hides under buildup, and the oil needs to reach bare metal to work.
- Apply penetrating oil generously. Spray or drip it directly onto the bolt head from above and onto the nut from below. Let gravity pull the oil down through the threads. Don't be stingy—saturate the joint.
- Wait 15 to 20 minutes. Patience matters more than force at this stage. For severe corrosion, a second application followed by another 15-minute soak doubles your odds. Some professionals even let the oil work overnight on badly seized bolts.
- Tap gently with a wrench handle. A few light taps on the nut transmit vibration through the corroded bond, helping the oil penetrate deeper into the threads. Don't hammer—just firm taps.
- Attempt to turn. Use an adjustable wrench or pliers on the nut below while holding the bolt head from above with a screwdriver for toilet seat bolts (flathead or Phillips, depending on your hardware). Turn slowly and steadily. If you feel the nut start to give, continue with controlled pressure. If it still won't move, stop—forcing it risks snapping the bolt inside the mounting hole.
No penetrating oil on hand? Warm white vinegar soaked into a rag and wrapped around the bolt for an hour can break light rust. It won't match the performance of a dedicated penetrating spray on heavily corroded hardware, but it's a workable alternative for mild cases.
Cutting Through Bolts That Will Not Turn
When oil, patience, and controlled wrenching all fail, cutting the bolt is the next logical step—and it's far less dramatic than it sounds. You're removing a small fastener, not demolishing the bathroom. Two tools handle this job well:
- Hacksaw: Slide the blade into the gap between the underside of the bowl and the top of the nut. Cut horizontally through the bolt shaft. A mini hacksaw (also called a close-quarters hacksaw) fits into the tight space behind the bowl more easily than a full-frame saw. Expect the cut to take three to five minutes per bolt.
- Oscillating multi-tool: Fit a metal-cutting blade and press it against the bolt in the same gap below the bowl. The oscillating action is easier to control in tight quarters and reduces the risk of the blade slipping into the porcelain. This method is generally faster than a hacksaw—about one to two minutes per bolt.
Before you make the first cut, protect the porcelain. Apply two or three layers of painter's tape to the bowl surface surrounding the bolt on all sides. This simple precaution prevents scratches from an errant blade or flying metal shavings. Wear safety glasses, too—tiny metal fragments are guaranteed to fly, and they find eyes with uncanny accuracy.
Once the bolt is severed, the nut drops free and the remaining bolt stub lifts out through the top of the mounting hole. Clean any rust residue from the porcelain hole with a damp rag before installing fresh hardware.
Dealing with Spinning Bolts and Stripped Threads
A spinning bolt is a different kind of maddening. You turn the screwdriver and the entire bolt rotates freely—round and round without loosening or tightening. This happens because the nut (or expanding anchor, on top-mount systems) is spinning along with the bolt instead of holding firm. It's one of the most common reasons people search for how to remove old toilet seat hardware, and it has a logical fix.
Work through these tactics in order, from least aggressive to most aggressive:
- Grip the nut from below with locking pliers. Clamp Vise-Grips onto the wing nut or hex nut underneath the bowl and lock them tight. The pliers act as a stationary anchor. Then turn the bolt from above with a screwdriver. With the nut unable to spin, the bolt either tightens or backs out—both outcomes solve the problem.
- Reverse the approach if space is tight. If you can't fit locking pliers underneath (common on toilets close to the wall), hold the bolt head from above with pliers and turn the nut from below with a wrench. Whichever side you can grip most securely should be the one you hold still.
- Check for stripped threads. If the nut turns freely along the bolt even when held, the threads are gone. Run the nut off the bolt by hand—if it slides without resistance, no amount of tightening will restore grip. The bolt and nut must be replaced as a set.
- Cut or snap the bolt. When threads are fully stripped and the bolt can't be removed by turning, cutting is the cleanest exit. Use the hacksaw or oscillating-tool method described above. For plastic bolts with stripped threads, you can often snap them by gripping the bolt head with pliers and rocking it side to side until the shaft fractures at the mounting hole—no saw required.
After removing the damaged hardware, resist the temptation to reuse any of the old washers or nuts. Replace the full fastener set. Stainless steel bolts and nuts are the best long-term investment here—they resist the bathroom humidity that caused the original corrosion and virtually eliminate the chance of a repeat seizure. A stainless steel bolt kit typically costs $5 to $12, and many kits include rubber washers, so you're set for a fresh, solid installation.
Adding toilet seat stabilizers—those small rubber gasket pads placed between the hinge and the porcelain—during reinstallation is another smart move. Stabilizers reduce the micro-movement that accelerates wear on new hardware and help the seat stay put longer between adjustments. They're especially useful on a loose toilet seat that has been retightened multiple times, because the mounting holes may be slightly worn from previous bolt friction.
Always replace corroded hardware with stainless steel fasteners and fresh rubber washers. Reusing old, compromised components guarantees you'll be back under the bowl with a hacksaw within a year.
Seized bolts and stripped threads are dramatic, but they're a solvable obstacle—not a dead end. The real question that comes up once the old hardware is off is whether the seat itself is still worth keeping. Some components, like soft-close dampers and quick-release mechanisms, fail internally in ways that no amount of new bolts can fix.
Repairing Soft-Close Hinges and Quick-Release Seats
Soft-close and quick-release mechanisms are two of the most popular upgrades on modern toilet seats—and two of the most misunderstood when something goes wrong. A toilet cover seat that once drifted down in perfectly controlled silence suddenly slams shut, or a lid that refuses to stay propped open, can seem like a mysterious malfunction. In reality, the mechanics behind these systems are straightforward, and understanding them is the fastest path to deciding whether you need a quick reset or a full hinge swap.
How Soft-Close Hinges Work and Why They Fail
Every soft-close hinge contains a small rotary damper—a cylindrical component filled with silicone-based damping fluid. When you lower the lid, the hinge rotates and activates the damper. Internal structures create fluid resistance that absorbs the kinetic energy of the falling lid, converting a free drop into a slow, quiet descent. It's the same principle used in cabinet soft-close hinges, just miniaturized to fit a toilet seat hinge barrel.
That elegant mechanism, however, has a finite lifespan. On average, soft-close hinges hold up for roughly 40,000 to 55,000 open-and-close cycles before performance degrades noticeably. Three failure modes account for nearly every soft-close complaint:
- Damper fluid leaks out. The internal seals degrade over time, allowing the silicone oil to weep past the piston. Less fluid means less resistance, and the lid closes faster—or slams outright.
- The internal piston seizes. Dried-out or contaminated fluid gums up the piston inside the damper cylinder. The hinge feels stiff, gritty, or locked in one position instead of moving smoothly through its full arc.
- The hinge pin wears. A worn pin allows the lid to wobble laterally even when the damper itself is still functioning, creating a toilet seat that feels loose despite tight mounting bolts.
Here's a detail that catches many homeowners off guard: a toilet lid won't stay up is often a symptom of a soft-close damper that has shifted to an "always closing" bias rather than a broken hinge. The damper's internal spring or detent that holds the lid open past a certain angle wears out, so the damper applies closing force throughout the entire range of motion. The lid isn't broken—it simply doesn't "catch" in the open position anymore. Propping the lid against the tank with a small adhesive bumper pad is a quick workaround, but replacing a toilet seat hinge set is the permanent solution.
Adjusting and Resetting Quick-Release Seat Mechanisms
Quick-release seats are designed for effortless cleaning—press a button on each hinge, lift the seat straight off, wipe down the bowl, and click everything back together. The problem is that over months of use, grime, mineral deposits, and soap scum accumulate on the mounting plate and guide rails beneath the seat. That invisible buildup is the most frequent reason a quick-release seat feels loose, sits slightly crooked, or doesn't click firmly into place after reattachment.
If you've been meaning to learn how to take off a toilet seat with a quick-release mechanism, the process doubles as routine maintenance. Follow these steps to clean and reset the connection:
- Locate the release buttons. They're typically on the back or underside of each hinge housing—small oval or circular buttons, one per side.
- Press both buttons simultaneously and lift the seat straight up. The seat and lid assembly detaches from the mounting posts or base plate that remain bolted to the bowl.
- Inspect the mounting posts and base plate. Look for crusty residue, dark grime lines, or chalky mineral buildup along the rails or around the post tops.
- Clean all contact surfaces. Use a non-abrasive bathroom cleaner or a 50/50 white vinegar-water solution and a soft cloth. Scrub the rails, post tops, and the mating channels on the underside of the seat hinges until all residue is gone. Avoid abrasive pads—they can scratch plastic guides and create new grooves that attract dirt faster.
- Check the base plate bolts. While the seat is off, try to wiggle each mounting post. Any movement means the bolts securing the plate to the porcelain have loosened. Tighten them using the appropriate screwdriver or Allen key, alternating sides a quarter-turn at a time.
- Reseat the assembly. Align the hinge channels with the mounting posts and press the seat firmly downward until you hear or feel a distinct click on both sides. Test by lifting the front of the seat gently—it should not disengage without pressing the release buttons.
- Sit and test. Shift your weight side to side. If the wobble is gone, you're done. If lateral play persists, the plastic retainer clips inside the hinge may be worn and replacing a toilet seat hinge set is the next step.
For seats where the soft-close damper has failed internally—closing speed no longer controlled, or the lid drops freely—no amount of cleaning or retightening restores the function. The damper is a sealed unit integrated into the hinge body on most designs, which means full hinge replacement rather than individual damper repair is typically necessary. When sourcing replacement hinge sets, matching the mounting-assembly type to your toilet's bolt system (top-mount or bottom-mount, as covered earlier) ensures the new hinges drop right in without modification.
A functioning soft-close hinge and a clean quick-release connection solve most of the "invisible" toilet seat problems—the ones where the hardware looks fine but the seat still misbehaves. Yet there's another category of everyday annoyance that has nothing to do with hinges or bolts at all: a seat that slides sideways or sits visibly crooked every time you stand up.
How to Stop a Toilet Seat from Sliding or Sitting Crooked
You've checked the bolts, confirmed the hinges are intact, and the soft-close mechanism works fine—yet the seat still drifts sideways every time you sit down. Or maybe it sits visibly crooked on the bowl, angled just enough to be irritating but not enough to explain why. This particular problem drives people quietly crazy because the hardware looks perfectly normal. The seat isn't broken toilet seat territory. The hinges are solid. Everything appears right, but nothing feels right.
The culprit is almost never the seat itself. It's the small, easily overlooked components that sit between the seat and the porcelain—rubber bumpers, bolt washers, and the fit between the mounting hardware and the bowl's holes. Fixing a sliding or crooked seat is one of the cheapest and fastest bathroom repairs you'll ever tackle, often costing under $10 and taking less than fifteen minutes.
Why Your Toilet Seat Slides Sideways or Forward
Three root causes account for the vast majority of sliding and crooked seats. Understanding which one applies to your situation tells you exactly what to fix—and what to skip.
- Worn or missing rubber bumpers: Flip your seat over and look at the underside. You'll see small rubber or silicone pads—usually two to four of them—stuck to the bottom of the seat ring. These bumpers create friction between the seat and the porcelain rim, preventing lateral movement. Over time, they compress flat, harden, peel off entirely, or accumulate a layer of bathroom grime that turns them slick. Once that friction disappears, the seat is essentially sitting on a smooth, glazed ceramic surface with nothing to grip. Even a slight shift in your body weight sends it sliding.
- Mounting bolts that are finger-tight but not wrench-tight: This is surprisingly common after a DIY installation or a quick toilet seat removal tool job. The bolts feel snug when you twist them by hand, but they lack that final quarter-turn of wrench pressure needed to lock the hinge plate firmly against the porcelain. The seat pivots freely around the loose bolts like a gate swinging on an under-tightened hinge.
- Mismatched seat size or oversized mounting holes: Not all toilet bowls are identical, and neither are the mounting holes drilled into the porcelain. If the bolt shaft is noticeably narrower than the hole it passes through, the entire seat can shift side to side within that gap—even when the bolts are fully tightened. This extra play is especially common when you how to uninstall toilet seat hardware from one brand and install a replacement from a different manufacturer with slightly different hinge spacing.
In many cases, more than one of these causes is at work simultaneously. A seat with worn bumpers and slightly loose bolts will slide far more aggressively than either issue would produce on its own.
Replacing Bumpers and Adding Anti-Slide Pads
If your inspection revealed flattened, missing, or grimy bumpers, replacing them is the single simplest fix for a sliding seat. You don't need to remove the seat from the bowl, and the entire job takes about five minutes.
Adhesive rubber bumpers are available at virtually any hardware store, home center, or online retailer, typically in packs of four to eight for a few dollars. Dedicated anti-slide bumper kits designed specifically for toilet seats—like L-shaped stabilizer bumpers that anchor to the bowl rim—have earned strong reviews from homeowners who dealt with persistent sliding that regular pads couldn't solve. Some shoppers report the fix taking under five minutes and lasting years.
Here's how to handle a standard bumper replacement:
- Peel off the old bumpers. Use your fingernail or a plastic scraper to remove any remaining pads and adhesive residue from the underside of the seat. If the adhesive is stubborn, a dab of rubbing alcohol on a rag dissolves it without damaging the seat surface.
- Clean the contact area. Wipe both the seat's underside and the porcelain rim with a damp cloth, then dry thoroughly. Adhesive bumpers bond best to clean, dry surfaces—any moisture or soap film weakens the hold.
- Position the new bumpers. Place them at the same spots where the originals sat—typically at the front left and front right of the seat ring, and sometimes two additional pads near the rear. If your replacement bumpers are slightly oversized for the flat area on your seat, trim them to fit with household scissors. A bumper that overhangs the edge of the seat will peel off quickly.
- Press firmly and wait. Push each bumper down for 15 to 20 seconds to activate the adhesive bond. Avoid sitting on the seat for at least 30 minutes—giving the adhesive time to cure makes a noticeable difference in long-term grip.
For seats where the mounting holes in the porcelain are wider than the bolt shaft, bumpers alone won't fully solve the sliding problem. The seat still pivots around the loose bolt-to-hole fit. In this case, rubber bushing inserts—small cylindrical sleeves that slide over the bolt shaft before it passes through the porcelain hole—fill the gap and eliminate lateral movement. Nylon washers stacked on the bolt above the porcelain surface serve the same purpose. Either option costs a dollar or two and turns a sloppy, oversized connection into a snug one.
Correcting a Crooked Seat After Re-Installation
A seat that sits crooked on the bowl after you tighten toilet seat bolts is almost always an alignment issue introduced during installation, not a defect in the seat. The fix is methodical positioning before you apply final torque.
Think of it the same way a mechanic tightens lug nuts on a wheel: snug everything evenly first, verify alignment, then apply final pressure in an alternating pattern. Rushing to crank one bolt down fully before touching the other pulls the seat off-center—and once the bolt bites hard into the washer, shifting the seat requires loosening everything and starting over.
- Start both bolts finger-tight. Thread the bolts through the hinges and into the mounting holes, but don't reach for a wrench yet. The seat should sit on the bowl with the bolts engaged but still loose enough to slide the seat left, right, forward, or backward by hand.
- Center the seat visually. Stand directly in front of the toilet and look down. Adjust the seat until the overhang is even on both sides and the front curve of the seat aligns with the front curve of the bowl. The gap between the seat edge and the porcelain rim should look symmetrical.
- Snug the bolts in alternating sequence. Tighten the left bolt a quarter-turn, then the right bolt a quarter-turn. Repeat, alternating sides, until both bolts are firm. This even-pressure approach keeps the seat from pulling to one side as you tighten toilet seat hardware to its final torque.
- Sit and test before final tightening. Lower the seat, sit down normally, and shift your weight slightly. If the seat moves or feels off-center, stand up, loosen the bolts half a turn, reposition, and retighten. This real-world test catches misalignment that visual inspection alone misses.
- Apply final torque. Once alignment is confirmed, give each bolt one last quarter-turn with a wrench—alternating sides—to lock everything in place.
After the final tightening, run through this quick verification checklist:
- Seat overhang is even on the left and right sides of the bowl.
- The front edge of the seat doesn't extend beyond the front edge of the bowl.
- Pushing the seat sideways with your hand produces no lateral movement.
- The lid closes flat against the seat ring with no rocking or gap on either side.
- Both bolt caps snap shut cleanly over the bolt heads (misaligned bolts prevent cap closure).
A seat that passes every item on that list is properly installed—and with fresh bumpers providing friction underneath, it should stay exactly where you put it for months or even years before needing attention again.
Sliding and crookedness are frustrating, but they're surface-level problems with surface-level solutions. The tougher judgment call comes when the seat itself is physically damaged—cracked, yellowed, or showing hinge wear that no bumper or bushing can compensate for. That's the point where repair stops making sense and replacement becomes the smarter investment.
When to Repair and When to Replace Your Toilet Seat
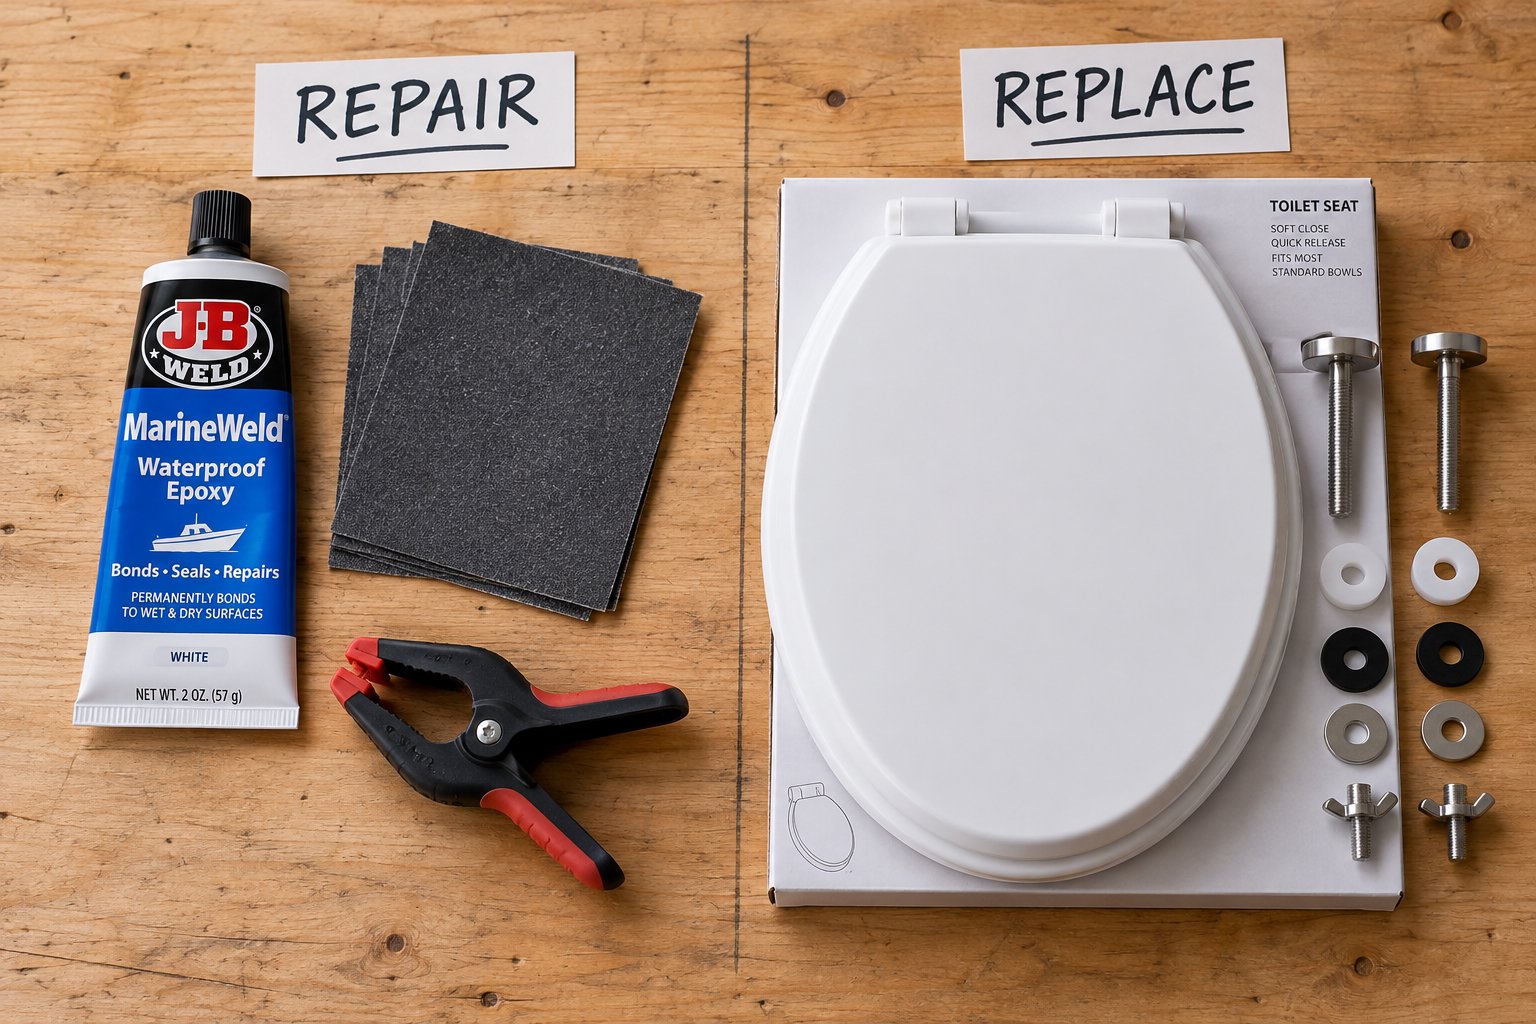
A wobbly seat, a sliding seat, even a seized bolt—those are fixable problems with clear, affordable solutions. A cracked seat is a different conversation entirely. Cracks introduce questions about safety, hygiene, and the diminishing returns of patching something that may already be past its useful life. Knowing where that line falls—repair versus replace—saves you from wasting money on a new seat you don't need and from clinging to one you should have swapped out weeks ago.
Temporary Fixes for a Cracked Toilet Seat
Not every crack demands an immediate trip to the hardware store. A hairline crack on a non-structural area—the outer edge of the lid, for instance, or a cosmetic surface chip that doesn't flex when you press near it—can often be stabilized with waterproof epoxy and monitored over time.
Here's how to assess whether a crack is patchable or dangerous:
- Locate the crack under good lighting. Run your fingernail across the surface slowly. You'll often feel a crack before you see it, as your nail catches in the groove.
- Press gently near the crack. Place your thumb on one side and your fingers on the other, applying light inward pressure. If the crack doesn't move at all—no flexing, no widening—it's likely a surface-level cosmetic issue.
- Check for flex under body weight. Sit on the seat normally and have someone watch the cracked area from the side. Any visible movement, even a millimeter, means the crack extends through the structural thickness of the seat. That's a safety and hygiene concern. Bacteria collect in flexing cracks that open and close, and a seat that flexes under load can split completely without warning.
For hairline cracks that pass the flex test, a two-part waterproof epoxy rated for porcelain or hard plastic provides a reliable temporary seal. Clean the area, roughen it lightly with fine sandpaper, mix the epoxy, and apply it into and over the crack with a putty knife. Most epoxies have only 15 to 30 minutes of working time before hardening, so have everything prepared before you mix. Allow the repair to cure overnight before using the seat. This approach typically costs $10 to $20 in materials and buys you months—sometimes years—of continued use.
However, any crack that flexes under sitting weight is not a candidate for epoxy. The bond will break repeatedly under cyclical stress, and the crack will continue growing. At that point, the seat has crossed from "repairable" to "replace immediately."
Signs That Full Replacement Is the Smarter Choice
Repair makes sense when a single, specific component has failed—a worn washer, a corroded toilet seat screw, a flattened bumper. Replacement makes sense when the seat itself has accumulated enough damage or wear that fixing one thing just reveals the next problem. If any of the following apply, your time and money are better spent on a new seat:
- Multiple cracks — Two or more cracks, even small ones, indicate material fatigue across the seat. Patching one won't prevent the next.
- Yellowing or permanent staining — Deep discoloration that cleaning can't remove is more than cosmetic. It signals material degradation in the seat's finish, often from years of chemical cleaner exposure.
- Hinge mounting holes enlarged beyond washer coverage — If the holes in the seat where the bolts pass through have worn oval or chipped, no washer can create a stable clamping surface. The seat will loosen again within weeks no matter how tight you make the bolts.
- Obsolete hinge pattern with no available hardware — Some older seats use proprietary hinge spacing or bolt sizes that are no longer manufactured. If you can't find compatible hardware to how to put a toilet seat on securely, replacement is the only path forward.
- Repeated loosening after tightening — You've retightened the bolts three or four times, replaced the washers, and the seat still won't hold. The issue is likely in the seat's hinge plates themselves—worn plastic slots or cracked brackets that no longer grip the bolt heads firmly.
When multiple items on that list apply simultaneously, continued repairs become more expensive and time-consuming than a straightforward replacement. A quality replacement seat runs $25 to $80 for most standard models, and the installation itself is a 15-minute job once you know how to take off toilet seat hardware from the old unit and how to replace toilet seat cover assemblies with a fresh set.
Before you uninstall toilet seat hardware from the old seat, measure the bolt-hole spacing (center to center) and the overall seat dimensions—length from front edge to bolt holes, and width at the widest point. These two measurements guarantee the replacement fits your bowl without guesswork. Most toilets use a standard bolt spacing of roughly 5.5 inches (140 mm), but compact and elongated models vary, and a mismatch means the bolts won't line up.
Choosing Durable Mounting Hardware for a Long-Lasting Installation
Here's a detail most replacement guides skip entirely: the seat you buy is only as stable as the hardware holding it down. You can install a premium seat on bargain-bin bolts and be back to square one within a year. The mounting hardware—bolts, washers, nuts, hinge pins, anchor sleeves—is what determines how tight should toilet bolts be and how long they stay that way before corrosion or compression loosens the grip.
Material choice matters more in a bathroom than almost any other room in the house. Bathroom humidity is relentless, and zinc-plated steel—the default finish on most budget bolt kits—offers only modest corrosion protection in indoor environments. That thin zinc layer degrades under constant moisture exposure, and once the base steel is exposed, rust sets in fast. It's the same failure cycle that created the seized bolts covered earlier in this guide.
Stainless steel hardware eliminates that cycle almost entirely. Stainless steel bases and bolt sets resist bathroom humidity year after year without the surface degradation that plagues zinc-plated alternatives. The upfront cost is marginally higher—typically a few dollars more per kit—but the long-term savings in avoided re-repairs and replacement hardware add up quickly.
For sanitary ware manufacturers and procurement teams sourcing mounting hardware at scale, bundled fixing systems that include hinge mounting kits, stainless steel bases, and compatible anchors for multiple seat standards simplify inventory and ensure consistent installation quality. Tianyun's Toilet Seat Fixing Systems offer exactly this kind of consolidated approach—covering both top-mount and bottom-mount configurations with custom fixing assemblies rather than requiring teams to piece together individual standalone components from separate suppliers. It's a practical sourcing reference worth bookmarking if you're specifying hardware for production runs or large-scale replacement programs.
Whether you're a homeowner tightening a single bolt or a sourcing manager ordering thousands of mounting kits, the principle is identical: durable hardware installed correctly is the difference between a seat that holds firm for years and one that starts wobbling again next month.
Most toilet seat problems are fixable in under 30 minutes with the right diagnosis and the right hardware. Identify the symptom, apply the targeted repair, and choose corrosion-resistant mounting components—that formula handles everything from a simple wobble to a full seat swap.
Frequently Asked Questions About Fixing a Toilet Seat
1. Why does my toilet seat keep coming loose after I tighten it?
A toilet seat that keeps loosening usually has a compressed rubber washer beneath the mounting nut, stripped bolt threads, or oversized porcelain mounting holes. The washer loses friction over time, so the nut gradually backs off under daily use. Replacing the rubber washer and switching to a stainless steel bolt kit typically solves the problem permanently. If the mounting holes are slightly enlarged, adding rubber bushing inserts around the bolt shaft eliminates the extra play that allows movement.
2. How do you fix a toilet seat that slides sideways?
Sideways sliding is most often caused by worn or missing rubber bumpers on the underside of the seat. These small adhesive pads create friction between the seat and the porcelain rim. When they flatten or peel off, the seat sits on a smooth glazed surface with nothing to grip. Replacing the bumpers with fresh adhesive pads takes about five minutes and costs just a few dollars. If the bolts also feel loose, snugging them an extra quarter-turn with a wrench while alternating sides ensures even clamping pressure.
3. Can you repair a cracked toilet seat or does it need to be replaced?
It depends on the crack's severity. A hairline crack on a non-structural area—like the outer lid edge—that does not flex under body weight can be stabilized temporarily with waterproof two-part epoxy rated for hard plastic or porcelain. However, any crack that visibly opens or moves when you sit down is a safety and hygiene risk. Bacteria collect in flexing cracks, and the seat can split without warning. In that case, full replacement is the safer and more cost-effective choice.
4. How do you remove toilet seat bolts that are rusted and won't turn?
Start by saturating the bolt and nut with penetrating oil and waiting 15 to 20 minutes. Tap the nut gently with a wrench handle to help the oil work into the corroded threads, then attempt to turn with steady pressure. If the bolt still won't budge, cut through the shaft using a mini hacksaw or oscillating multi-tool fitted with a metal-cutting blade. Protect the porcelain with layers of painter's tape before cutting, and always wear safety glasses to guard against metal fragments.
5. What is the difference between top-mount and bottom-mount toilet seat bolts?
Top-mount systems tighten entirely from above using a bolt that threads into an expanding rubber or plastic anchor hidden inside the porcelain mounting hole—no hardware is visible underneath the bowl. Bottom-mount systems use a bolt that passes through the hinge, drops through the porcelain hole, and is secured from below with a washer and wing nut. Top-mount designs are common on modern and wall-hung toilets, while bottom-mount setups are standard on most traditional open-back models. Each system has different failure points and requires a different tightening approach.
Apply This Insight to Your Project
Tell us what you are building and how the topic “Loose, Stuck, or Crooked: How Do You Fix a Toilet Seat Fast?” relates to your application. Our engineering team can help evaluate the next step.


